Name plates – seemingly simple, yet they hold the power to make a lasting first impression. They are the silent ambassadors of our personality, our brand, or our home, silently conveying a message before we even utter a word. For artists, this silent communication takes on a whole new dimension, becoming an opportunity to express creativity and individual style. Beyond mere functionality, a name plate can be a miniature work of art, reflecting the same talent and passion poured into larger pieces. This is why mastering the art of creative name plate design is essential for any artist looking to showcase their unique identity.
This guide provides a comprehensive, step-by-step approach to crafting personalized and visually stunning name plates. From initial concept and material selection to final finishing touches, we’ll walk you through each stage, enabling you to create a name plate that is as distinctive and unforgettable as your artistic vision. Let’s dive into the process of transforming a simple sign into a captivating masterpiece.
Preparation and Safety Guidelines
- pencil
- eraser
- black sketch pen
- black marker
- bright crayons
- Always prioritize safety when working with sharp tools like knives or saws, especially when cutting materials for your name plate. Wear appropriate safety gear like gloves and eye protection.
- Ensure proper ventilation when using paints, stains, or other potentially harmful chemicals. Work in a well-ventilated area or wear a respirator mask.
- If working with electronics or power tools, always disconnect power before making any adjustments or repairs. Follow manufacturer's instructions carefully.
Step-by-Step Instructions
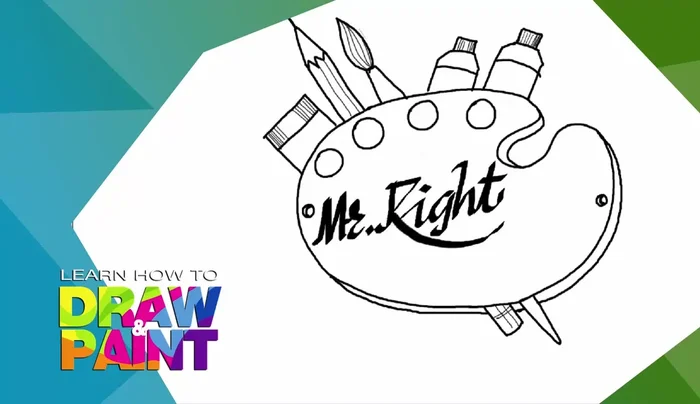
Sketching the Basic Shape
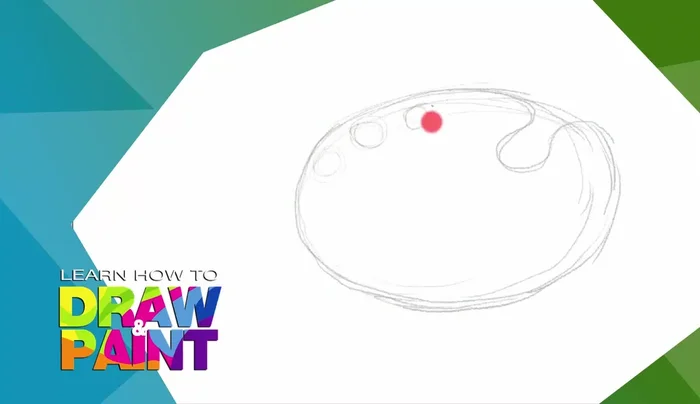
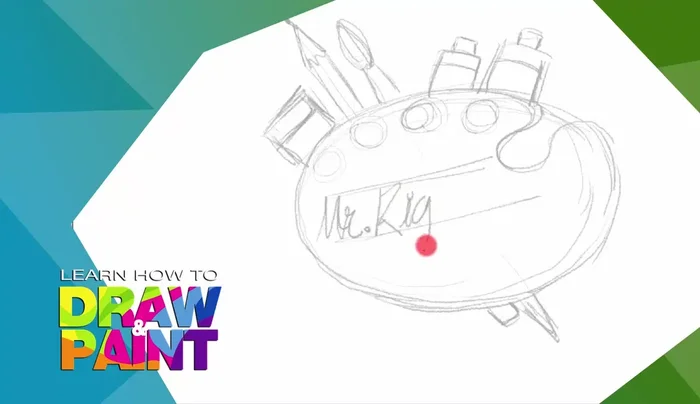
- Sketch a rough oval shape for the color palette.
- Draw curves joined to the oval to form the palette's outer shape.
- Draw four circles on the palette for color wells.
- Draw a brush coming out from the top of the palette.

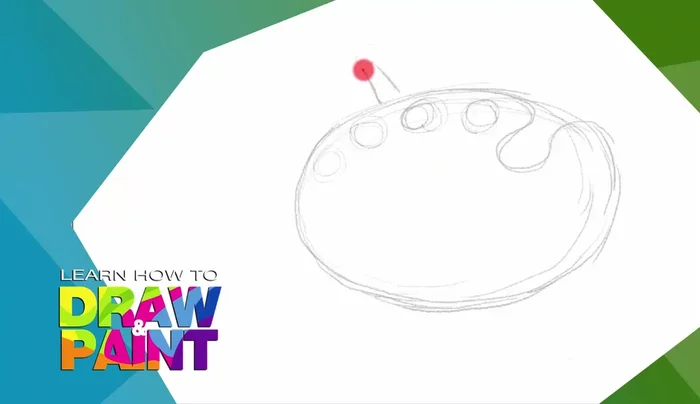
Sketching the Basic Shape - Draw a pencil to the left of the palette using basic shapes.
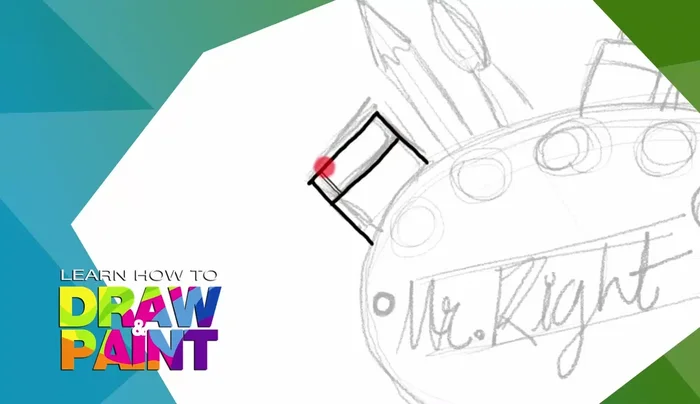
- Draw a poster color bottle to the left of the pencil.
- Draw a color tube or pastel tube to the right of the palette.
- Draw two lines in the center of the palette for the name.
Sketching the Basic Shape - Draw two small holes on the top of the palette for hanging.
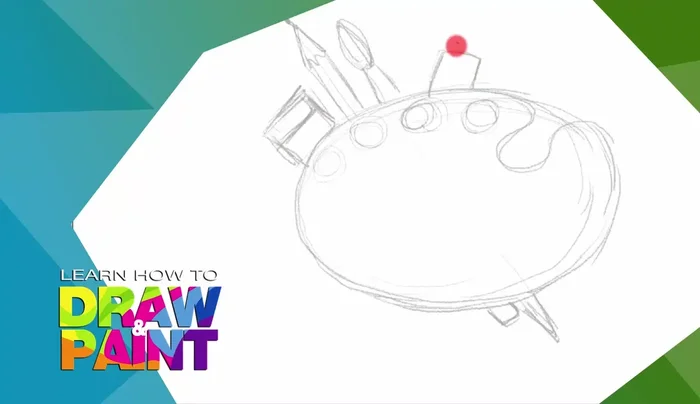
Sketching the Basic Shape Adding the Name
- Write the name within the lines.
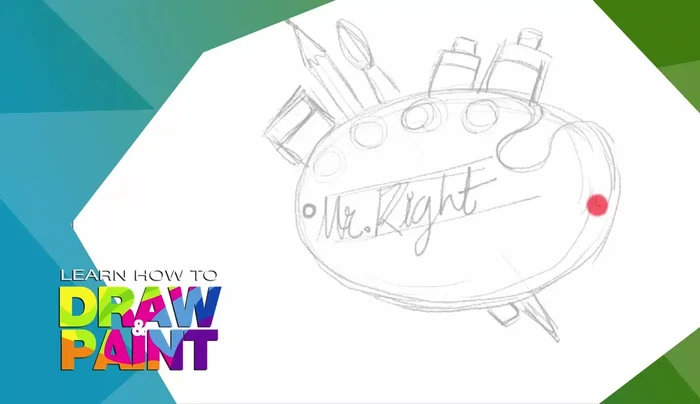
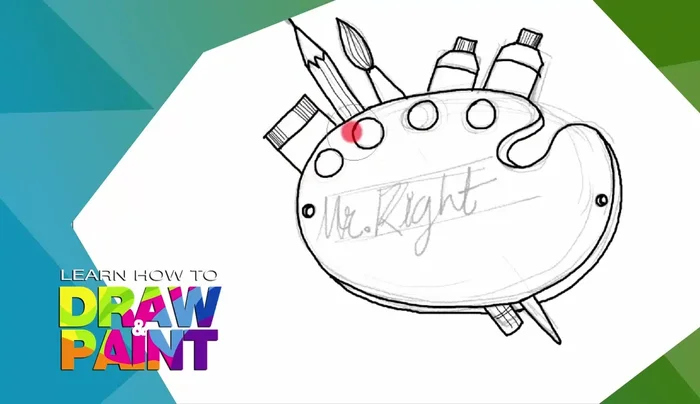
Adding the Name Inking the Design
- Outline the entire composition with a black sketch pen, paying attention to details like light lines on objects.
Inking the Design Cleaning Up the Sketch
- Erase the pencil marks carefully.
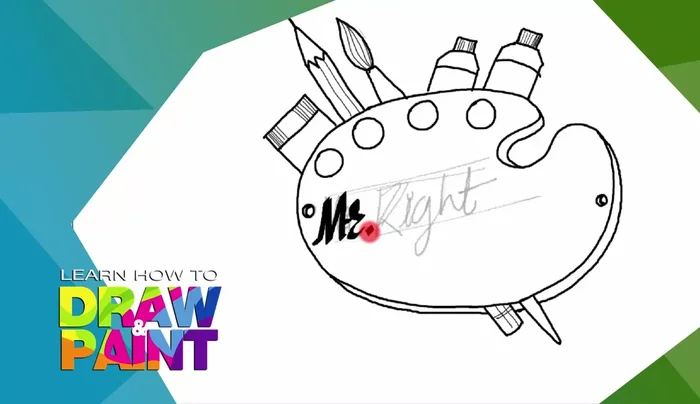
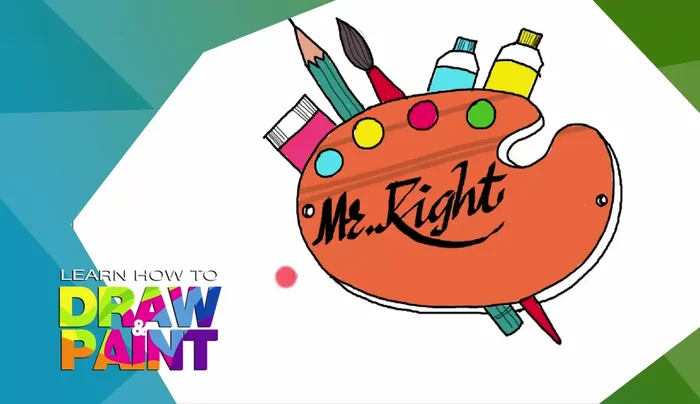
Cleaning Up the Sketch Calligraphy and Final Name
- Write the name again with a black marker in a calligraphy style.
Calligraphy and Final Name Coloring and Texturing
- Color the palette and other objects using bright crayons, starting from the outlines and moving inwards.
- Add wood texture to the palette using brown lines.
Coloring and Texturing


Read more: Super Crown Cosplay Tutorial: Fabric Covering for a Professional Finish
Tips
- Use brighter colors for a more vibrant name plate.
- Always color from the outline inwards to avoid going outside the lines.
- Get creative with the objects you choose to represent your interests or profession.