Blast off into a world of creative fun with this exciting DIY project! Building your own 3D foam rocket is a fantastically rewarding experience, perfect for kids and adults alike. This engaging craft requires minimal materials and offers a surprising amount of creative freedom, allowing you to personalize your rocket with colors, designs, and even added features like fins and nose cones. Forget expensive store-bought toys – unleash your inner engineer and create something truly unique and spectacular.
Get ready for lift-off as we guide you through a simple, step-by-step process to construct your very own miniature space explorer. This detailed guide will walk you through each stage of the construction, from preparing the foam to decorating your finished masterpiece, ensuring a fun and successful crafting experience. So gather your supplies and let's begin building your magnificent foam rocket!
Preparation and Safety Guidelines
- 3D foam rocket kit
- Silicon glue
- Adult supervision is required at all times, especially when using sharp tools like scissors or craft knives.
- Handle spray adhesive in a well-ventilated area and away from open flames. Avoid inhaling the fumes.
- Ensure the foam pieces are securely attached before handling the finished rocket to prevent them from falling off and causing injury.
Step-by-Step Instructions
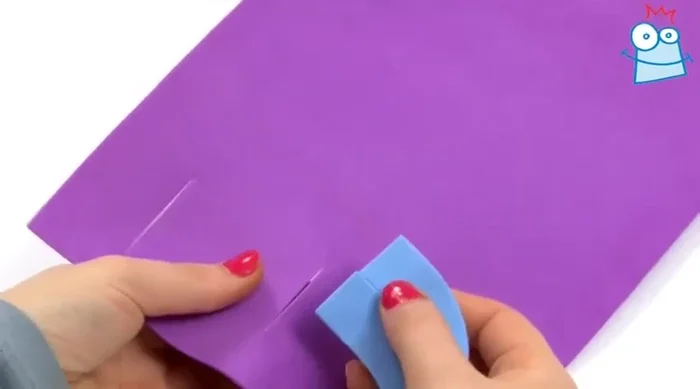
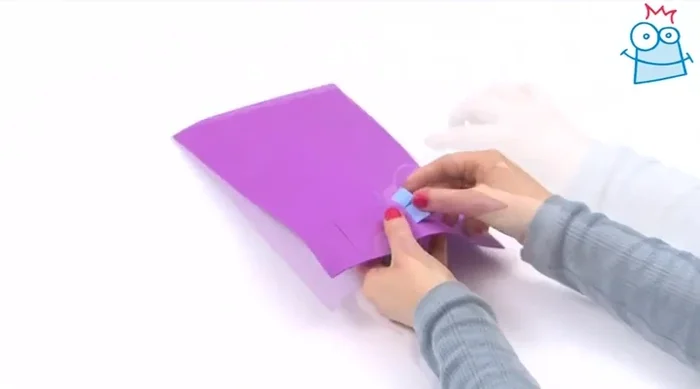
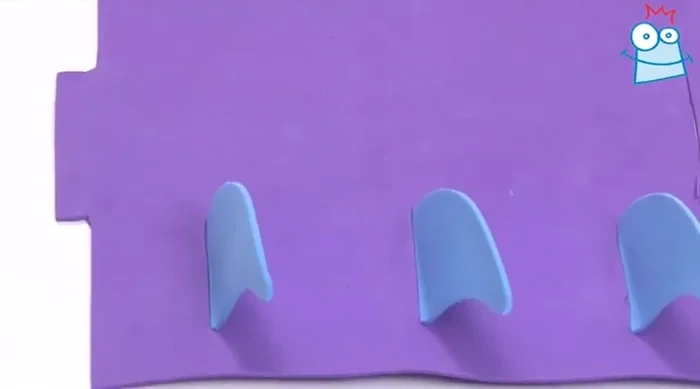
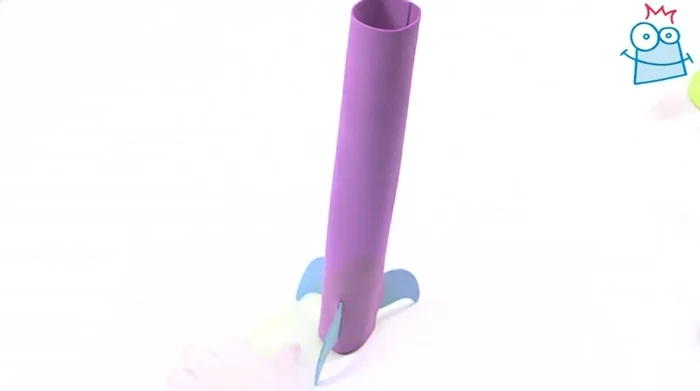
Attaching the Rocket Feet
- Push a blue rocket foot through a pre-cut slot in the large purple foam sheet.
- Fold the flaps in opposite directions and secure with silicon glue. Hold for a few seconds.
- Repeat step 2 with the remaining two sets of feet.

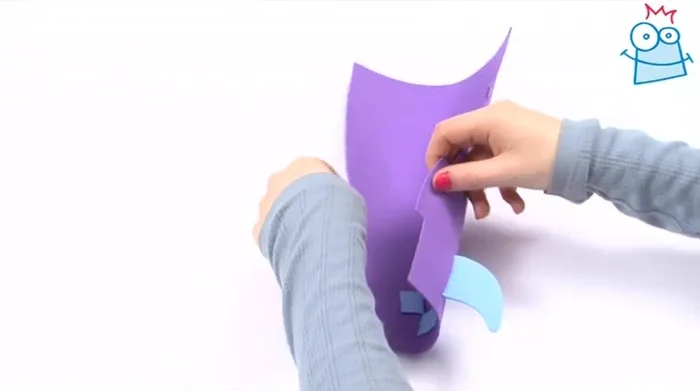
Attaching the Rocket Feet Forming the Rocket Body
- Bend the large foam shape into a cylinder, feeding the two side tabs through pre-cut slots.
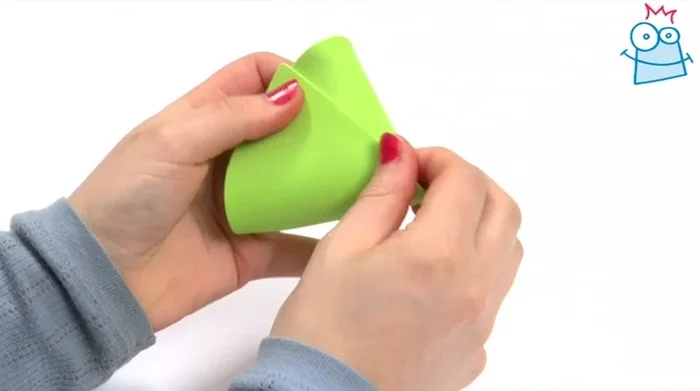
Forming the Rocket Body Creating and Attaching the Cone
- Glue the semicircular green foam shape along the end and roll it into a cone.
- Attach the cone to the top of the rocket with glue.
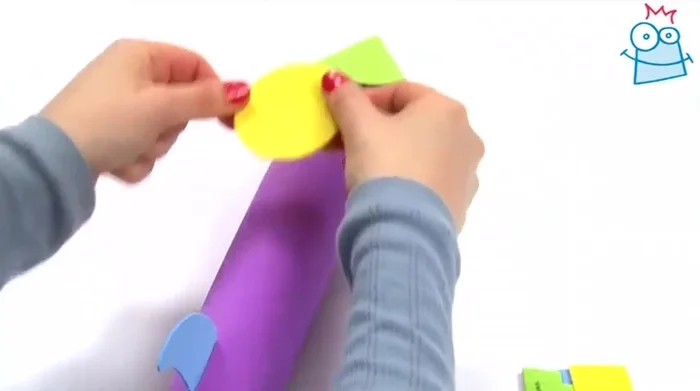
Creating and Attaching the Cone Decorating the Rocket
- Yellow circle, blue SWR sticker, yellow star, green spots).
Decorating the Rocket
Read more: Super Crown Cosplay Tutorial: Fabric Covering for a Professional Finish
Tips
- Hold the glued parts in place for a few seconds to ensure proper adhesion.
- Press down gently on the stickers to avoid damaging them.