Spring is in the air, and with it comes the delightful anticipation of Easter! This year, ditch the store-bought decorations and unleash your creativity with a fun and simple craft project: making adorable foam clay Easter eggs. These charming little ornaments are perfect for adding a handmade touch to your home, whether you hang them from your Easter tree, doorway, or simply display them in a pretty basket. Foam clay is incredibly easy to work with, making this project ideal for crafters of all skill levels, from seasoned pros to enthusiastic beginners. You'll be surprised at how quickly you can transform plain foam eggs into festive masterpieces.
Forget expensive and complicated decorations – these DIY foam clay eggs are both budget-friendly and incredibly satisfying to create. With just a few basic supplies, you can personalize your eggs with vibrant colours, delightful patterns, and charming embellishments. Ready to transform some plain foam eggs into adorable Easter treasures? Let's dive into the step-by-step guide below and get crafting!
Preparation and Safety Guidelines
- Vulcan slime (foam clay)
- Strings (red and yellow shown)
- Straw
- Adult supervision is required, especially for young children handling sharp tools like craft knives or scissors.
- Foam clay can be messy. Protect your work surface with newspaper or a plastic sheet.
- Ensure adequate ventilation when working with foam clay, as some may have a slightly strong odor.
Step-by-Step Instructions
Shape the Egg
- Shape the foam clay into an oval/egg shape.

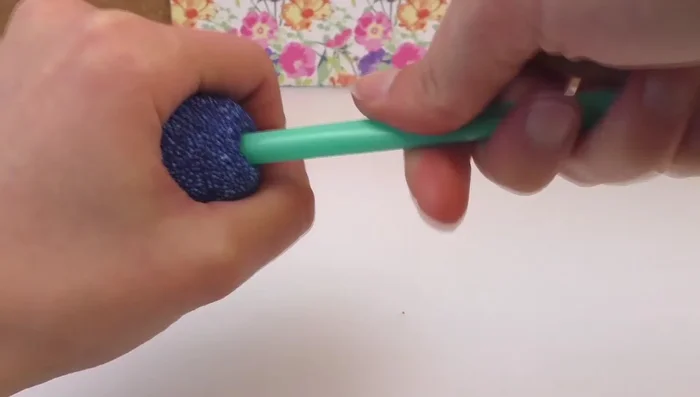
Shape the Egg Create Hanging Hole
- Carefully insert a straw into the top of the egg.
- Twist the straw to create a hole for hanging.
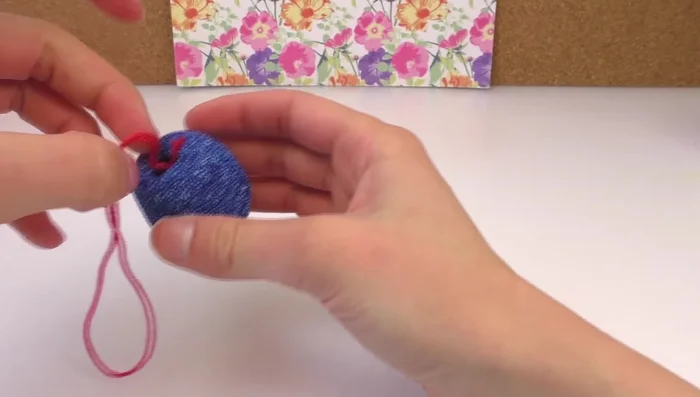
Create Hanging Hole Attach the String
- Cut a piece of string, double it, and tie a knot.
- Insert the knotted string through the hole and secure it with more foam clay.
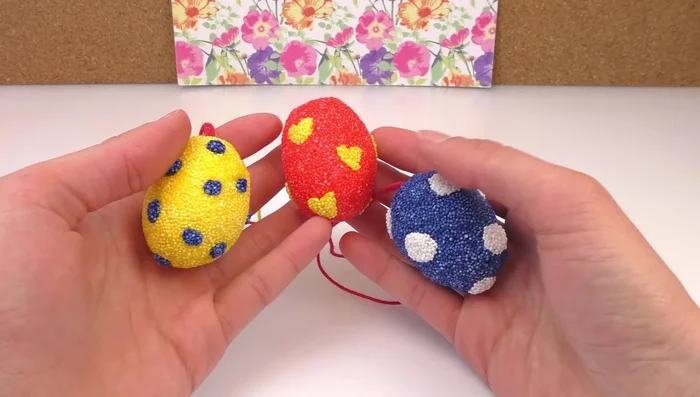
Attach the String Decorate the Egg
- Add decorative elements (dots, hearts, etc.) using small amounts of foam clay.
Decorate the Egg Dry the Eggs
- Let the eggs air dry completely (1-2 days). Avoid using a hairdryer.
Dry the Eggs


Read more: Super Crown Cosplay Tutorial: Fabric Covering for a Professional Finish
Tips
- Ensure the straw is placed in the center to allow for even hanging.
- To dry the eggs evenly, turn them over halfway through the drying process.