Shibori, the ancient Japanese art of resist dyeing, offers a captivating world of texture and color. From delicate floral patterns to bold geometric designs, the possibilities are endless. But have you ever dreamed of capturing the ethereal beauty of crashing ocean waves in your own fabric creations? This mesmerizing effect, achievable through a specific shibori technique, transforms plain cloth into a dynamic piece of wearable art, perfect for everything from scarves and dresses to wall hangings. The flowing lines and subtle shading mimic the fluidity of the sea, adding a touch of serene power to any project.
This guide will unlock the secrets to achieving this stunning ocean wave shibori tie-dye effect. We’ll walk you through each step of the process, from preparing your fabric and choosing your dyes to creating the characteristic wave pattern and achieving the perfect color gradients. Prepare to be amazed as you transform ordinary fabric into a breathtaking masterpiece of textile art. Let’s dive in!
Preparation and Safety Guidelines
- Shirt
- One-inch PVC pipe (approx. 1.5-2 feet)
- Rubber bands
- Kite string
- Turquoise dye
- Royal blue dye
- Baby blue dye
- Plastic tub
- Always wear gloves when handling dyes to protect your skin from irritation and staining.
- Work in a well-ventilated area, as some dyes can produce fumes.
- Protect your work surface with plastic sheeting or a drop cloth to prevent staining.
Step-by-Step Instructions
Prepare the Shirt
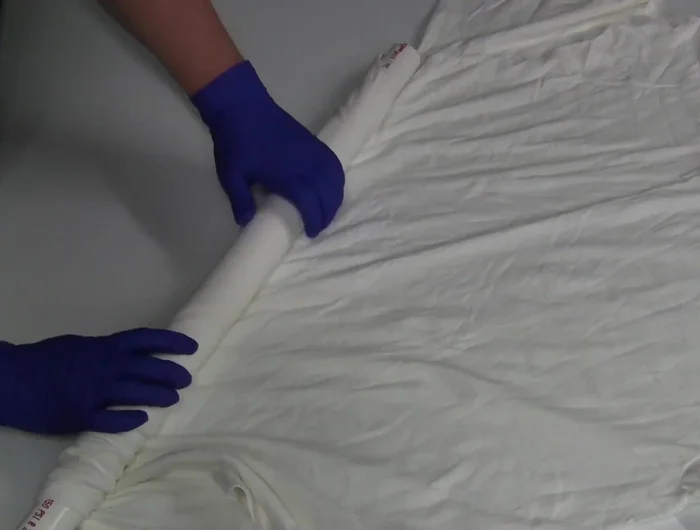
- Lay the shirt flat and place the PVC pipe at one corner.
- Roll the shirt tightly around the pipe, pushing it from both ends towards the center to create wrinkles.
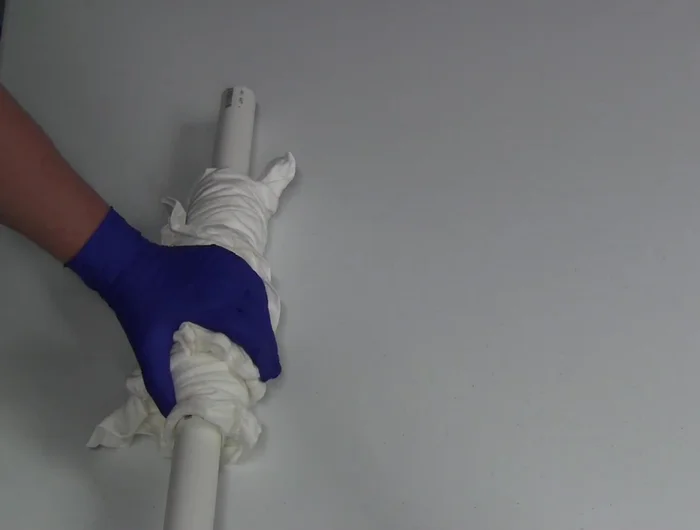
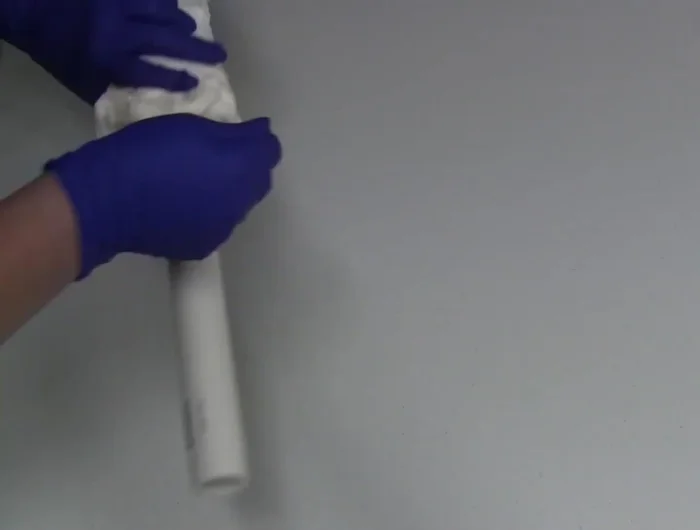
- Secure the shirt on the pipe using rubber bands at each end to prevent slippage.
- Tie the shirt tightly with kite string, bunching it further to create more wrinkles.

Prepare the Shirt Dye Application Setup
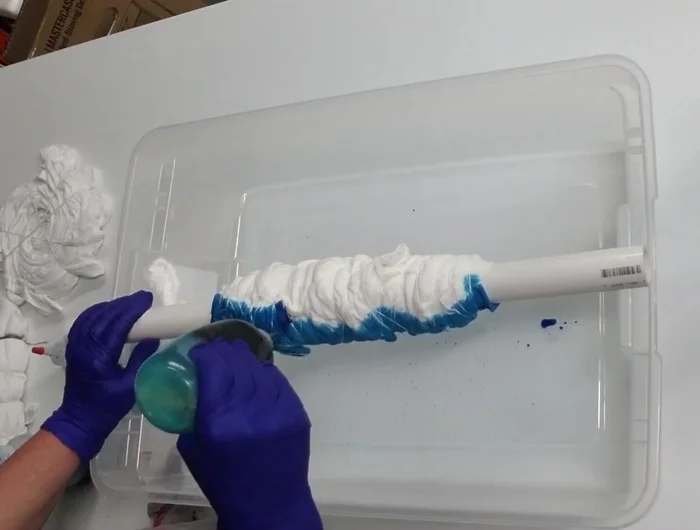
- Place the PVC pipe with the rolled shirt over a plastic tub to catch excess dye.
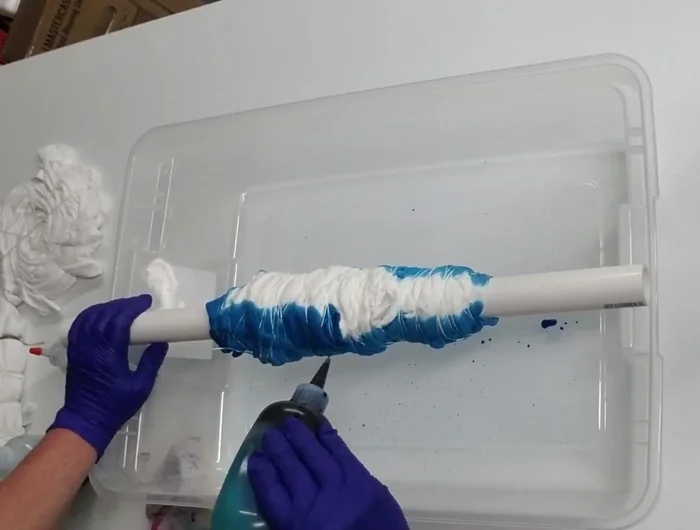
Dye Application Setup Apply Turquoise Dye
- Apply turquoise dye, turning the pipe to coat the entire shirt. Avoid over-saturation.
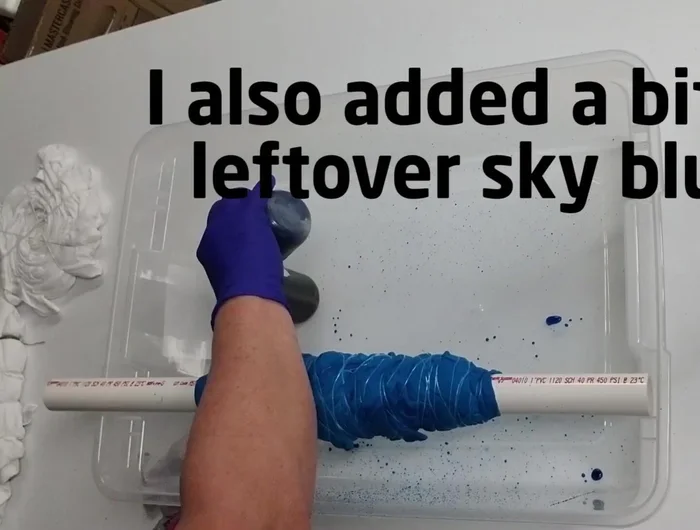
Apply Turquoise Dye Apply Blue Dye
- Apply a mixture of royal blue and baby blue dye over the turquoise, again avoiding over-saturation.
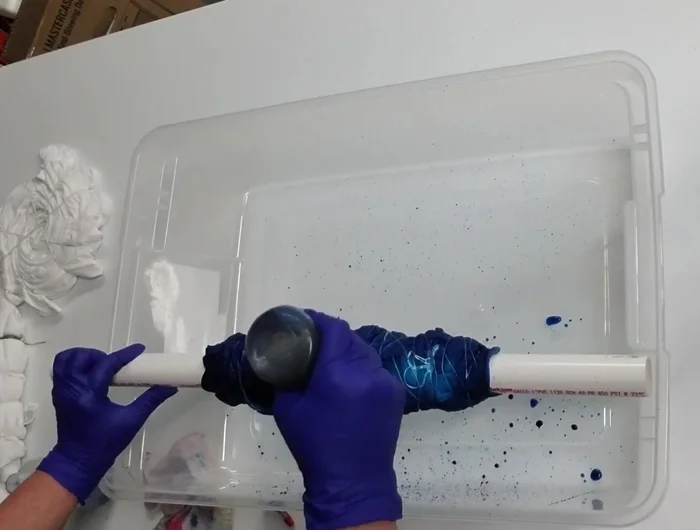
Apply Blue Dye Process the Shirt
- Set aside and let the shirt process for 24 hours.
Process the Shirt

Read more: DIY Picture Frame from Oat Cartons and Fabric: A Simple & Unique Craft
Tips
- The more wrinkles you create, the better the dye effect.
- Avoid over-applying dye to maintain a balance of colors and preserve some white space in the design.