Easter is just around the corner, and you're probably already thinking about decorating your home for the spring festivities. This year, ditch the messy dye and embrace a wonderfully simple craft project that's perfect for all skill levels – no-sew fabric Easter eggs! These charming decorations require minimal materials, are incredibly quick to make, and offer a fantastic opportunity for creativity. You can customize them with different fabrics, embellishments, and fillings to match your personal style, making them unique and memorable keepsakes. Forget complicated crafting techniques; this project is all about achieving adorable results with ease.
Skip the needle and thread entirely; these delightful eggs are made using only fabric scraps and a few clever techniques. Get ready to unleash your inner artist and create a stunning Easter display that will impress everyone. This no-sew tutorial will guide you through each step of the process, from choosing your fabrics to adding the final touches. Let's get started!
Preparation and Safety Guidelines
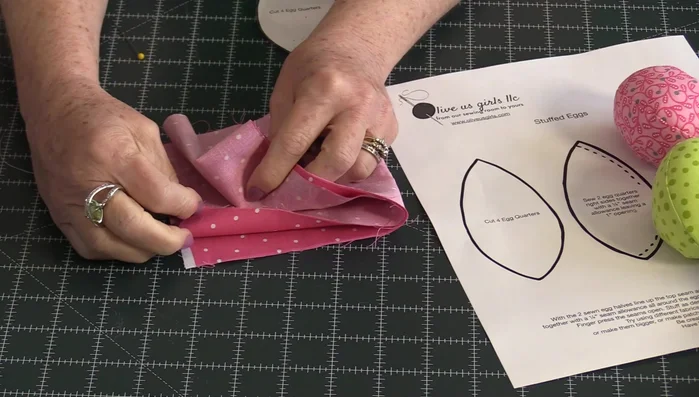
- Fabric
- Pins
- Needle
- Thread
- Stuffing
- Adult supervision is required, especially when working with young children and sharp scissors or hot glue guns (if used for embellishments).
- Ensure fabrics used are clean and free from any potential allergens before handling or placing near food.
- Always allow any glue or adhesive used to dry completely before handling the finished Easter eggs to prevent smudging or damage.
Step-by-Step Instructions
Prepare Fabric Pieces
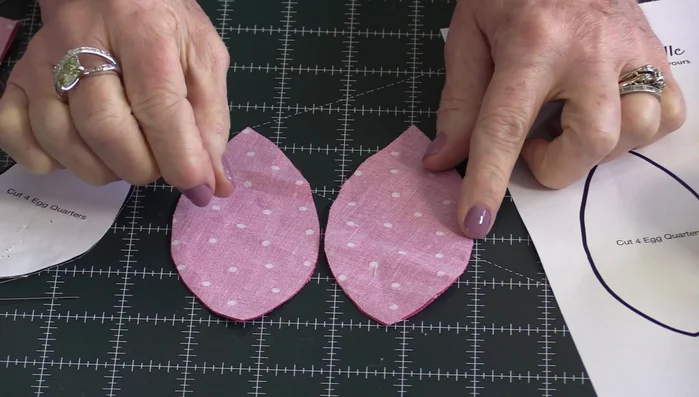
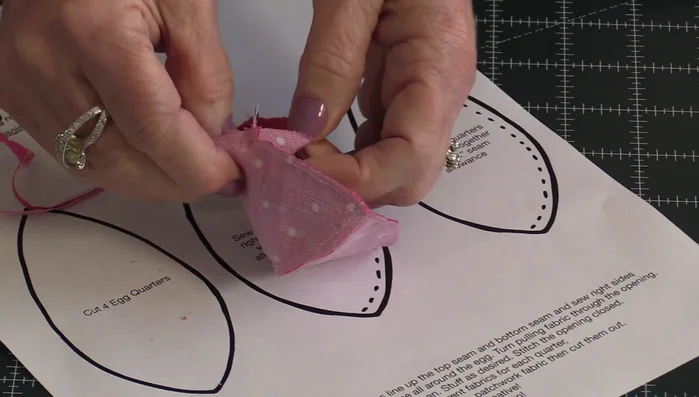
- Cut four identical egg shapes from fabric, with right sides facing.

Prepare Fabric Pieces Sew Egg Halves
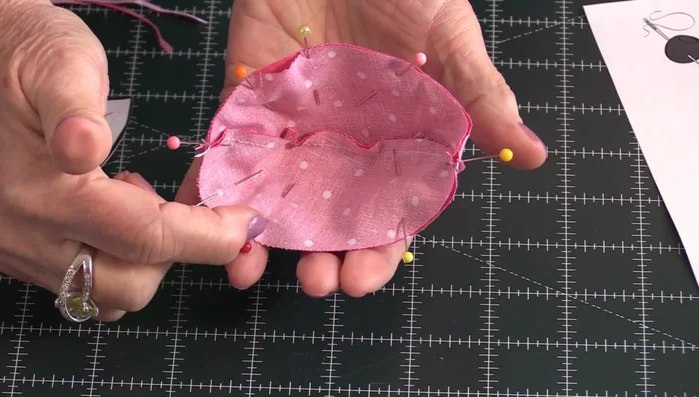
- Sew two pairs of egg shapes together using a quarter-inch seam allowance. Trim seams.
Sew Egg Halves Assemble Egg
- Turn one egg right-side out and insert it into the other egg, matching seams.
Stitch and Trim
- Stitch around the outside edge, leaving a gap for turning.
- Trim the seam allowance, leaving the opening larger.
Stitch and Trim Stuff the Egg
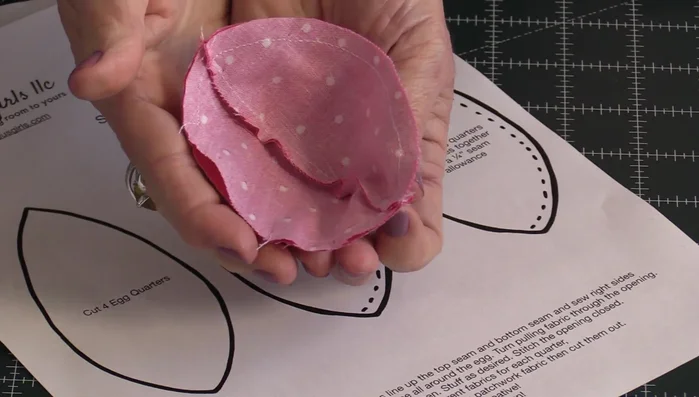
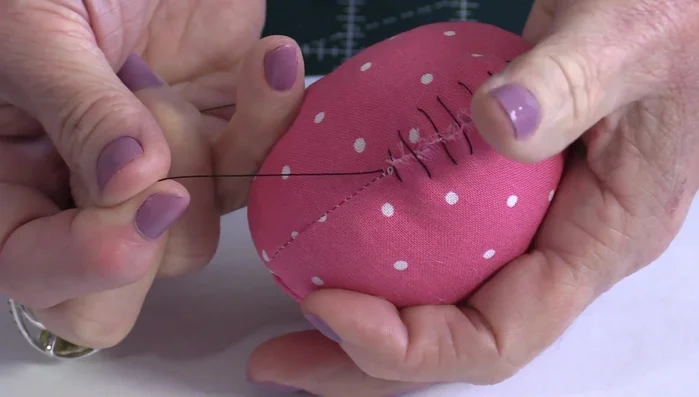
- Turn the egg right-side out and stuff firmly.
Stuff the Egg Close the Opening
- Close the opening using a ladder stitch. (Video demonstrates this technique)
- Tuck the seam allowance inside using thumb pressure while pulling the stitching thread closed.
Close the Opening
Read more: DIY Picture Frame from Oat Cartons and Fabric: A Simple & Unique Craft
Tips
- Press your fabric before cutting to achieve a cleaner finish.
- Use small stitches when sewing curves for a smoother, more professional look.
- Use a thread that matches your fabric for a more discreet finish on the ladder stitch.