Tired of overflowing clothes hampers and a closet bursting at the seams? Instead of tossing those old t-shirts, let's explore a fun and rewarding way to give them a new lease on life! This guide delves into the exciting world of DIY t-shirt wreaths, transforming unwanted garments into charming and unique home décor. Upcycling is not only environmentally conscious but also a fantastic outlet for creativity, allowing you to personalize your home with pieces that reflect your individual style and tell a story. You'll be surprised at how easily those forgotten tees can be transformed into beautiful, eye-catching wreaths perfect for any season or occasion.
This project is perfect for crafters of all skill levels, requiring minimal tools and materials. From choosing your t-shirts to the final touches, we’ll walk you through every step of the process, ensuring you achieve a stunning result. Ready to turn your textile trash into treasure? Let's dive into the step-by-step instructions below and create your own magnificent DIY t-shirt wreath!
Preparation and Safety Guidelines
- Old t-shirt
- Craft felt
- Felt embellishments
- String
- Foam embellishments
- Styrofoam wreath shape
- Thick craft glue
- Scissors
- Ruler
- Pencil
- Use sharp scissors or fabric shears carefully to avoid cuts. Always cut away from yourself and your body.
- If using hot glue, work in a well-ventilated area and keep away from flammable materials. Adult supervision is required.
- Be mindful of the fabric's condition. Avoid using heavily stained or damaged shirts which may fray or tear easily during crafting.
Step-by-Step Instructions
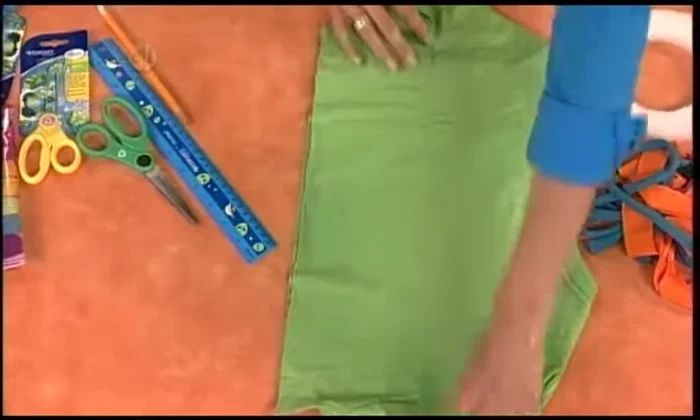
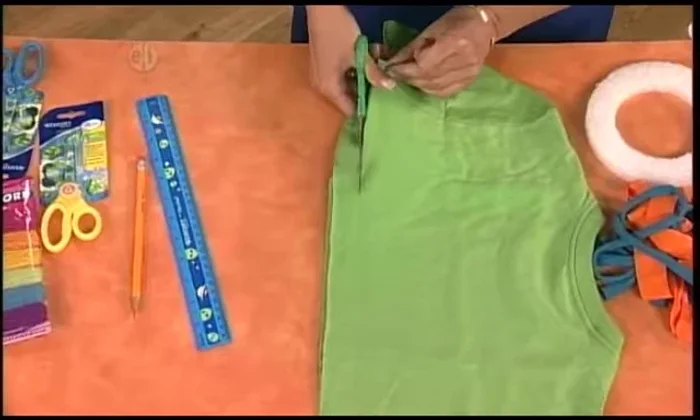
Prepare T-Shirt Strips
- Cut off the bottom seam of the t-shirt and cut strips from end to end. Aim for strips about 1 inch wide.
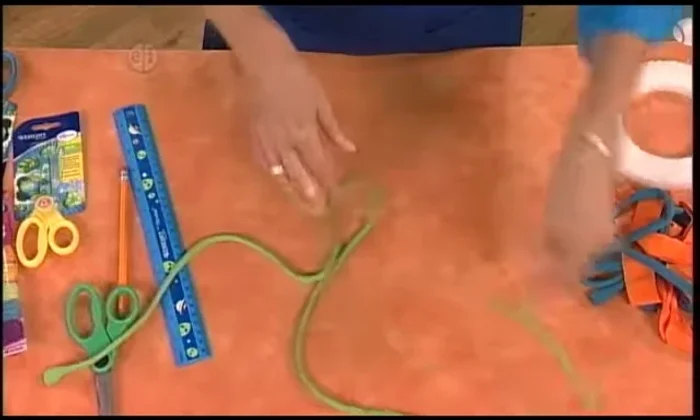
- Cut down the length of the t-shirt, including sleeves, up to the neck. Cuts don't need to be perfect.
- Open up the loops and pull the piece between your hands to curl the strips.

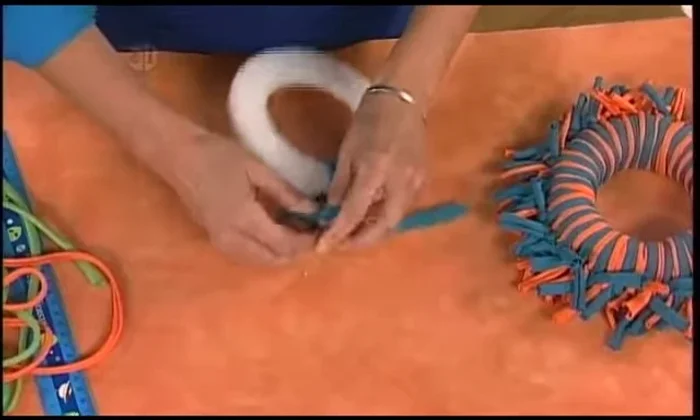
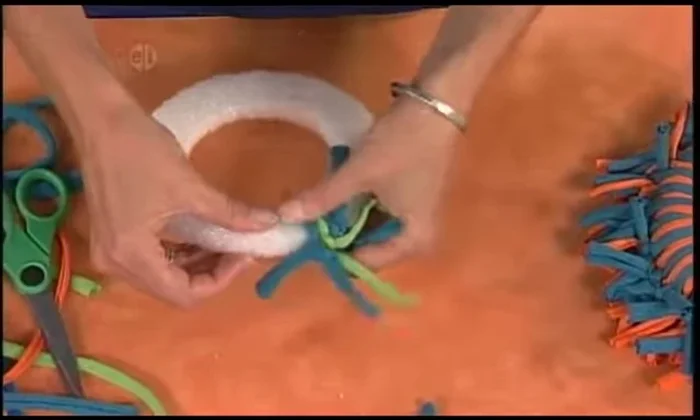
Prepare T-Shirt Strips Create the Wreath Base
- Tie the loops around the styrofoam wreath shape, keeping the knotted section at the top edge. Trim after each loop.
Create the Wreath Base Add Texture and Dimension
- Add jute cord or novelty yarn between the t-shirt strips for added texture.
- Scrunch the t-shirt loops together as you add more for a fuller, more textured look.
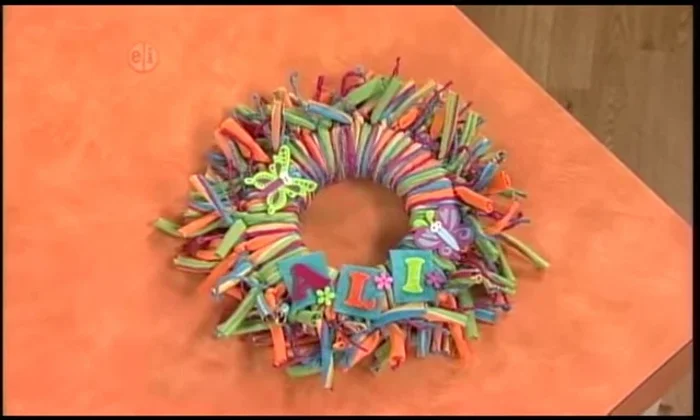
Add Texture and Dimension Decorate the Wreath
- Add felt embellishments, letters, or other decorations using glue to secure them.
Decorate the Wreath Add Hanging Loop
- Add a final piece of t-shirt to the back to create a loop for hanging.
Read more: DIY Picture Frame from Oat Cartons and Fabric: A Simple & Unique Craft
Tips
- Using a ruler helps create consistently wide t-shirt strips.
- Choose your favorite colors for a personalized touch.
- Pre-cutting all loops is an option but the raggedy look adds charm.
- Add a little extra glue to embellishments for extra security.