Paper chains are a classic craft, bringing back nostalgic memories of childhood creativity. But what if we could transform this simple craft into something a little more exciting? Get ready to slither into a world of fun with this DIY paper chain snake craft! This project is perfect for kids and adults alike, offering a fantastic opportunity to unleash your inner artist while creating a charming, decorative snake. Whether you're looking for a rainy day activity, a classroom project, or a unique party favor, this craft is surprisingly versatile and requires minimal materials.
Forget boring, predictable paper chains! This easy-to-follow tutorial will guide you step-by-step through the process of transforming colorful strips of paper into a playful, wiggling snake. Prepare to be amazed by how simple it is to create a surprisingly realistic (and adorable!) serpent, perfect for adding a touch of whimsy to your home, classroom, or anywhere else you can imagine. Let's get started!
Preparation and Safety Guidelines
- Paper
- Ruler
- Scissors
- Glue
- Markers or Crayons
- Adult supervision is required, especially for young children, to prevent choking hazards from small paper pieces or accidental ingestion of glue.
- Use child-safe scissors and glue to avoid injuries. Always cut away from yourself and others.
- Ensure the workspace is clean and free of clutter to prevent accidents.
Step-by-Step Instructions
Prepare the Paper
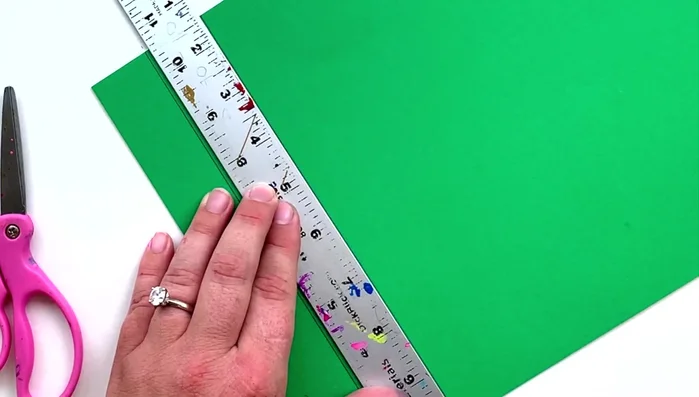
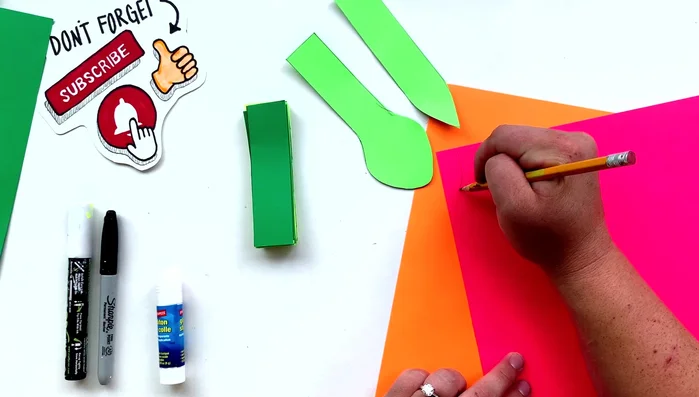
- Cut four pieces of paper into five equal sections using a ruler.

Prepare the Paper Cut the Strips
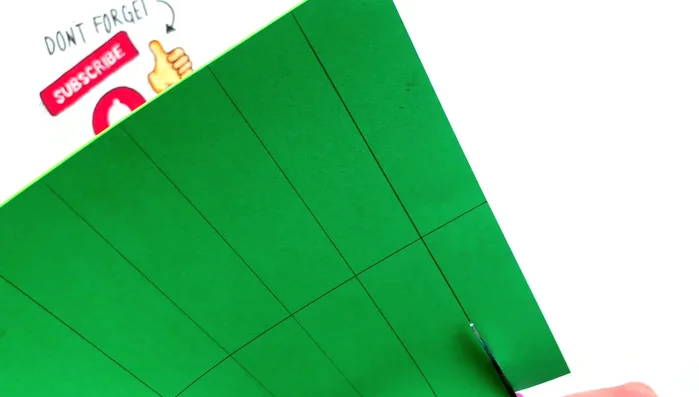
- Cut each section in half while keeping the papers aligned to maintain order.
Cut the Strips Create Head and Tail
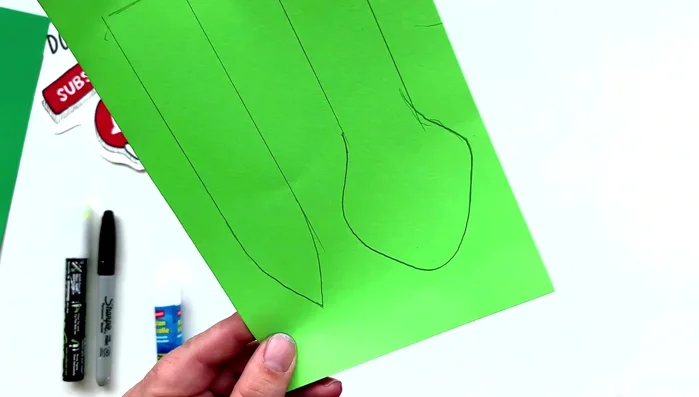
- Choose a color for the head and tail, draw two stripes on the chosen paper, and then draw the shapes for the head and tail.
Create Head and Tail Cut Out Head and Tail
- Cut out the head and tail pieces you've drawn.
Cut Out Head and Tail Create Details
- Draw and cut out a tongue and two eyes for your snake.
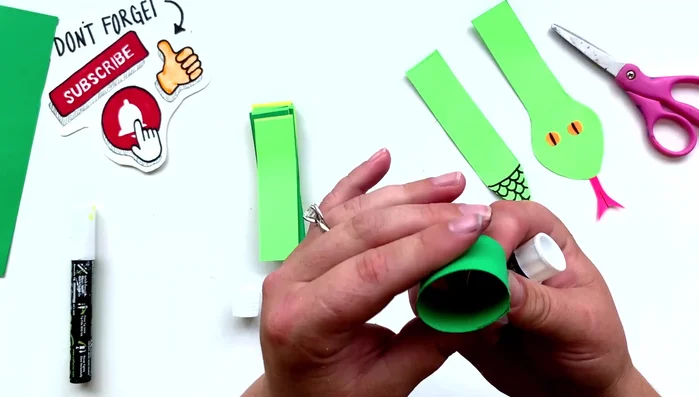
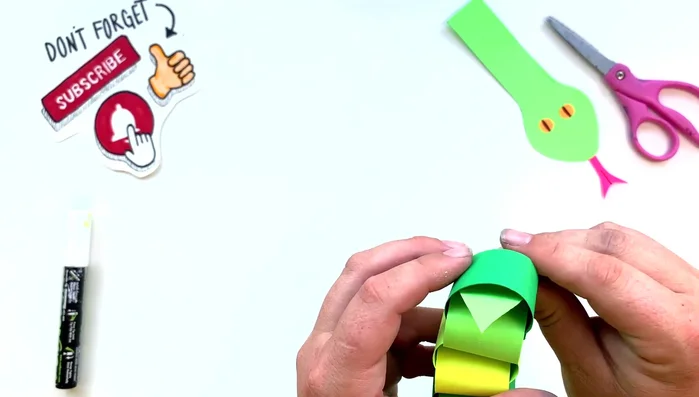
Create Details Assemble the Chain
- Apply glue to one end of a paper strip, roll it into a circle, and glue it to the other side. Repeat this process, linking the rings together to form a chain.
Assemble the Chain Attach Head and Tail
- Slide the head and tail pieces through the ends of the paper chain and secure them with glue.
Attach Head and Tail Add Finishing Touches
- Add details such as nostrils and polka dots to personalize your snake.
Add Finishing Touches

Read more: DIY Toilet Paper Roll Rockets: A Fun and Easy Craft Project
Tips
- You can use any colors you like for your snake. A rainbow snake would look amazing!
- If cutting all four pieces of paper at once is difficult, mark the stripes on each piece individually.
- Keep the paper strips aligned while cutting to maintain order.