Independence Day is a time for celebration, fireworks, and showing off your patriotic spirit! This year, ditch the mass-produced decorations and create something truly unique and dazzling: a DIY lighted paper star. These charming ornaments are surprisingly easy to make, offering a beautiful and festive alternative to traditional decorations, perfect for adorning your home or adding a special touch to your Independence Day gathering. They cast a warm, inviting glow, bringing a touch of magic to any space. Imagine the twinkle of these handcrafted stars illuminating your patriotic party!
Crafting these stunning stars is a fun and rewarding project for all skill levels. Whether you're a seasoned crafter or a complete beginner, you'll be amazed by how quickly and easily you can transform simple paper and lights into a captivating centerpiece. Ready to embark on this festive crafting adventure? Let's dive into the step-by-step instructions to create your own magnificent DIY lighted paper stars for Independence Day.
Preparation and Safety Guidelines
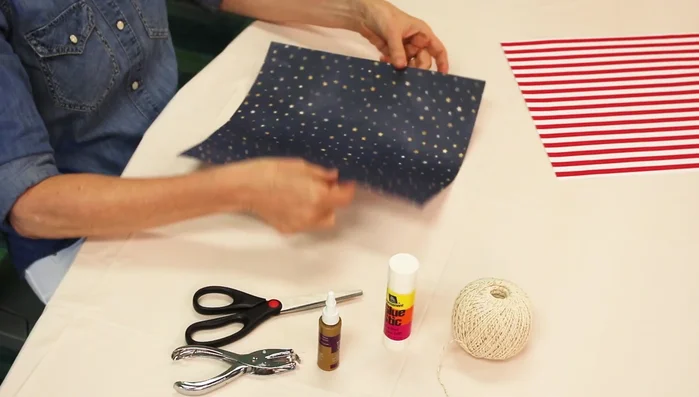
- Single-use adhesive LED light
- Hole punch
- Scissors
- String
- Two 12-inch square sheets of scrapbook paper
- Glue (strength depends on paper thickness)
- Always supervise children when using hot glue guns, scissors, or any sharp objects.
- Use battery-operated tea lights or LED lights instead of open flames to prevent fire hazards.
- Ensure all electrical connections are secure and properly insulated to prevent short circuits.
Step-by-Step Instructions
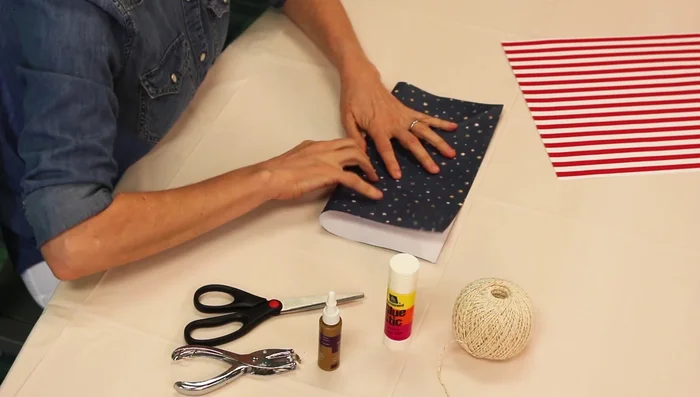
Prepare the Paper
- Place square paper (pattern side down), fold in half across one diagonal, then the other, open it flat.
- Fold the paper in half in one direction, then the other, open it flat again.
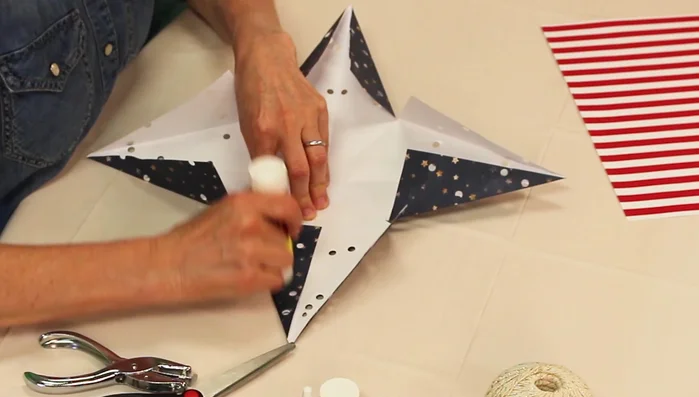
- Make 2.5-inch cuts along horizontal folds (not diagonal), about halfway to the center.

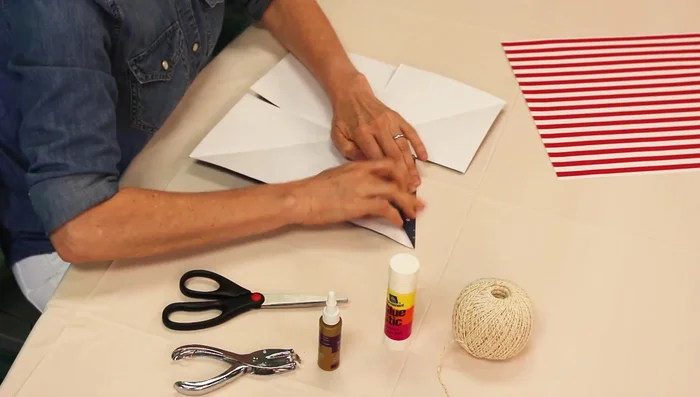
Prepare the Paper Create Star Points
- Fold in the sides of each cut to meet the diagonal fold line to create star points.
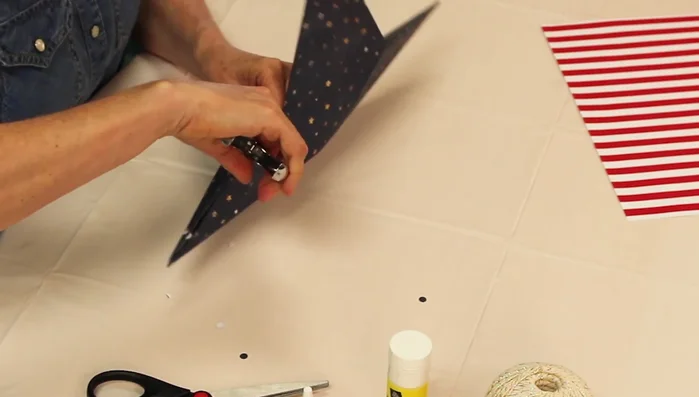
Create Star Points Add Holes and Assemble the First Star Half
- Use the hole punch to add holes as desired (align holes on front and back of both stars).
- Apply glue to one triangular flap, press the matching flap on top, lining it up with the bottom flap. Repeat for each point.
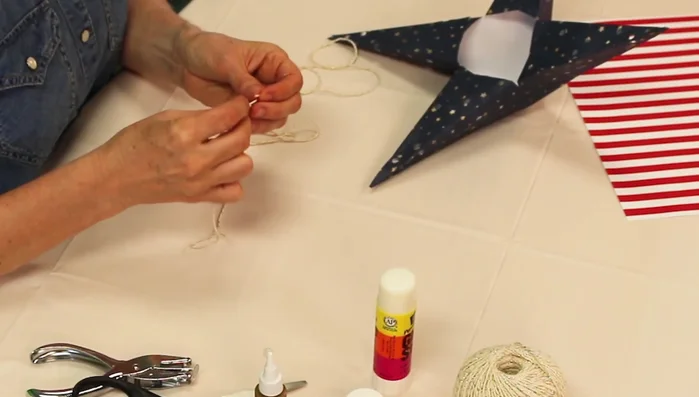
- Tie a knot in a string and place it inside a corner of one star's center, securing it with glue. Let dry for one hour.
Add Holes and Assemble the First Star Half Create the Second Star Half
- Repeat steps 1-7 to make the second star half.
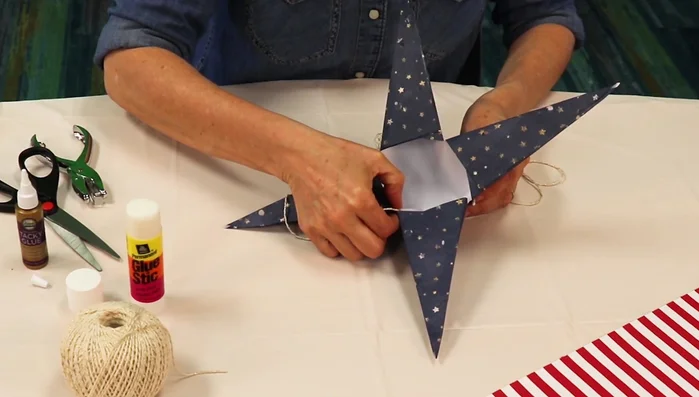
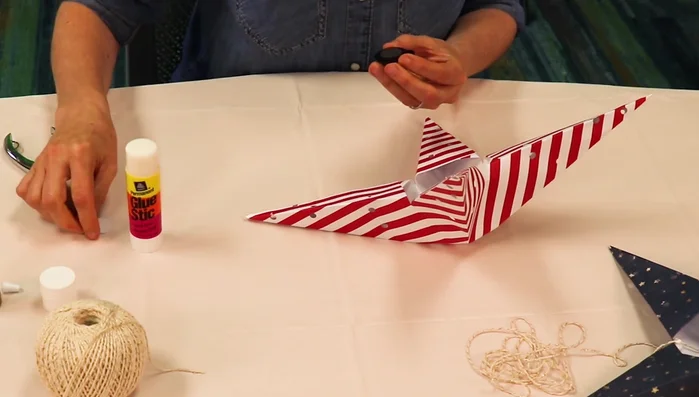
Create the Second Star Half Add the LED Light
- Peel the adhesive backing off the LED light and glue it inside one star's center.
Add the LED Light Join the Star Halves
- Hold both star halves together to find matching points, apply glue to those points, press together, and hold until dry (at least one hour).
Join the Star Halves


Read more: DIY Toilet Paper Roll Rockets: A Fun and Easy Craft Project
Tips
- Glue choice depends on paper thickness: thin paper - Elmer's glue or glue stick; thicker paper - tacky glue or fabric glue; very thick paper - hot glue.
- Ensure holes are aligned on both stars for a neat finished product.