Transform ordinary windows into captivating works of art with this charming DIY project! Pressed leaves and other gathered nature elements offer a unique and readily available medium for creating stunning, personalized window decorations. Imagine the warm, autumnal hues of pressed maple leaves framing a sun-drenched kitchen window, or delicate wildflowers adding a touch of springtime whimsy to a child's bedroom. This craft is not only aesthetically pleasing but also incredibly satisfying, allowing you to connect with nature and unleash your inner creativity. The beauty lies in its simplicity – using readily accessible materials to achieve a surprisingly elegant result.
Beyond the inherent beauty, creating these pressed leaf windows is surprisingly easy. This tutorial will guide you through each step, from preparing your natural treasures to the final display, ensuring you achieve a professional-looking finish regardless of your crafting experience. So gather your supplies, head outdoors for a nature walk, and let's begin creating these charming, personalized windows together!
Preparation and Safety Guidelines
- Iron
- Wax Paper
- Dried Leaves (or other thin materials)
- Parchment Paper
- Card Stock
- X-acto Knife (or hole punch)
- Scissors
- Glue
- Towel (optional)
- Always supervise children during this craft. Small, potentially hazardous items like pins or sharp tools should be kept out of reach.
- Use caution when handling sharp tools like scissors or knives for cutting leaves and other materials. Always cut away from yourself.
- Ensure proper ventilation when working with any potentially harmful materials like sprays or adhesives. Read and follow all product safety instructions.
Step-by-Step Instructions
Gather Materials & Prepare Workspace
- dried leaves, wax paper, parchment paper, card stock, and crafting tools.
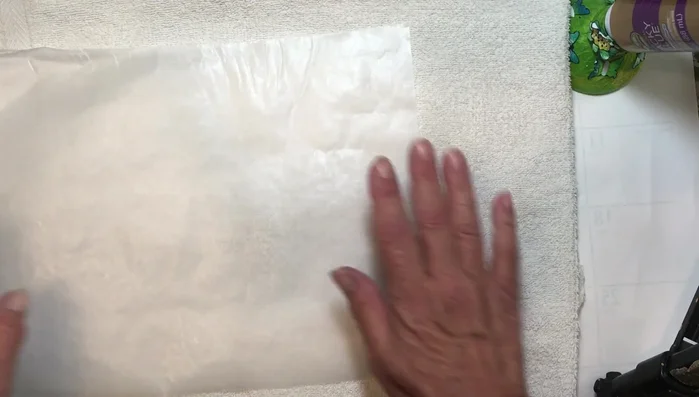
- Place a towel on your table (or use an ironing board). Cover with parchment paper to protect the surface.

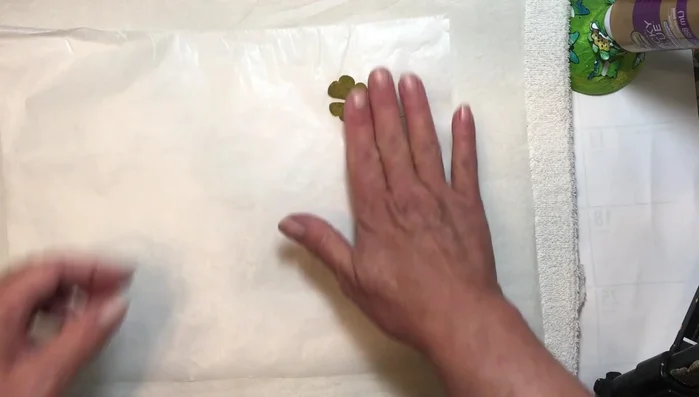
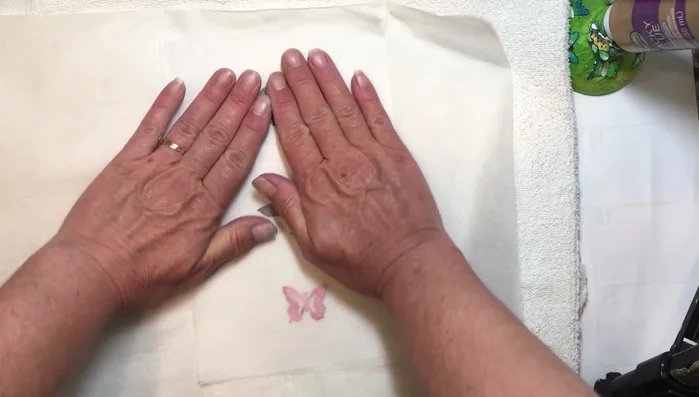
Gather Materials & Prepare Workspace Create Wax Paper Sandwich
- Place your dried leaves (or other thin materials) between two sheets of wax paper, with the shiny side of the wax paper facing the items.
Create Wax Paper Sandwich Iron & Seal
- Iron the wax paper sandwich on medium heat. Move the iron slowly, ensuring the wax melts and seals the leaves between the paper.
Iron & Seal Cool & Harden
- Let the wax paper cool completely to allow the wax to harden and seal the leaves.
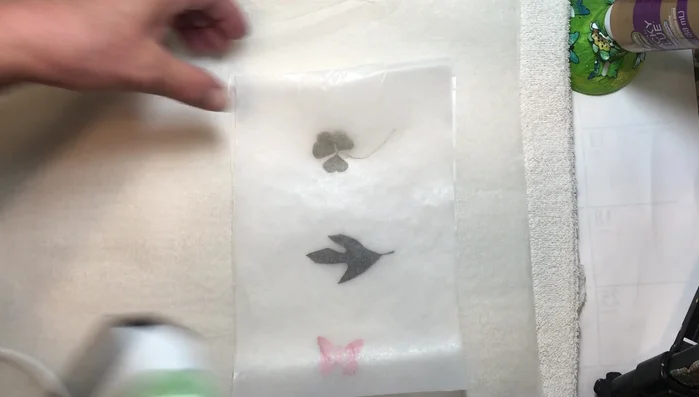
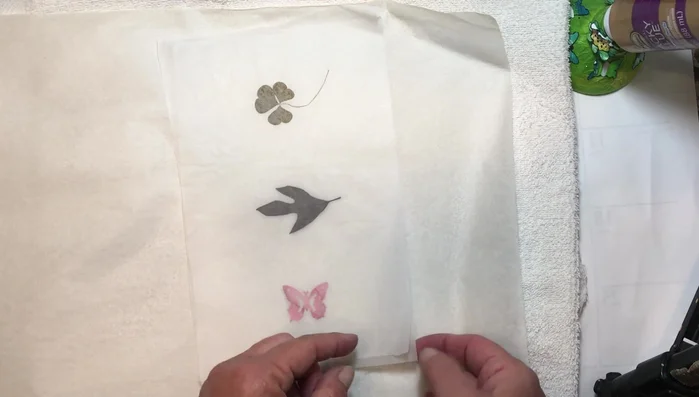
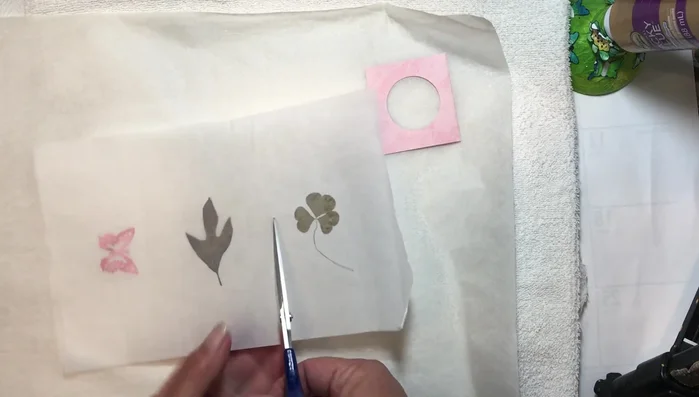
Cool & Harden Separate & Cut
- Carefully peel apart the wax paper, revealing your pressed leaf or nature element windows.
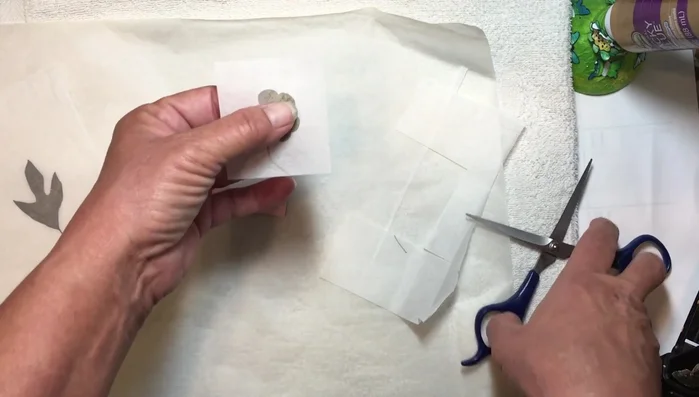
- Cut out the desired shape around your pressed element, leaving a border of wax paper.
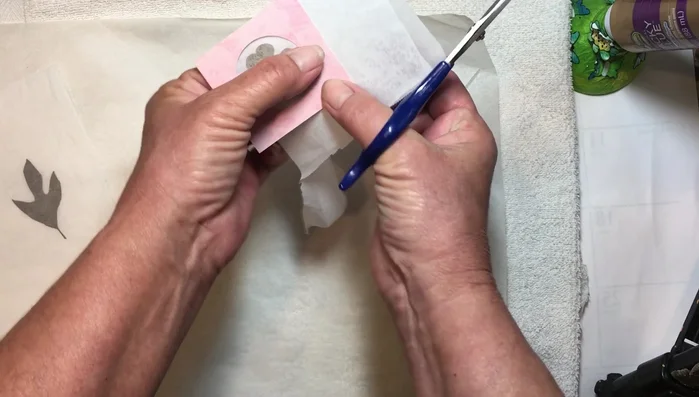
Separate & Cut Glue & Finish
- Glue the wax paper window into your chosen frame (card stock, tag, etc.).
- Trim any excess wax paper for a clean finish. Gently press to secure.
Glue & Finish

Read more: DIY Toilet Paper Roll Rockets: A Fun and Easy Craft Project
Tips
- Use thinner materials for better results when pressing.
- Always use parchment paper under your wax paper to protect your iron from wax.
- Don't leave the iron stationary on the wax paper for too long, to avoid burning or discoloration.
- For best results, use wax paper with a high wax content. Modern wax paper is often less waxy than older varieties.