Birthdays are extra special when celebrated with homemade crafts, and what better way to add a festive touch than with a personalized treasure hunt? This project combines the joy of painting rocks with the excitement of a scavenger hunt, resulting in adorable, easy-to-make “Happy Birthday” bunting. Perfect for little hands, this activity encourages creativity and problem-solving, fostering a sense of accomplishment as children transform ordinary stones into colorful, celebratory decorations. It's a wonderfully interactive and memorable way to build anticipation for the birthday itself.
Forget expensive store-bought decorations; this project utilizes readily available materials and requires minimal adult supervision. From painting cheerful letters to hiding the painted rocks, every step is designed to be fun and engaging for kids of all ages. Ready to transform your child's birthday into a rockin' good time? Let's dive into the step-by-step guide and create some magical birthday bunting!
Preparation and Safety Guidelines
- Rocks
- White acrylic paint
- Flat brush
- Pencil
- Eraser
- Assortment of bright colored acrylic paints
- Uni Posca paint pens (various colors)
- Fine black paint pen (Uni Posca PC-1MR)
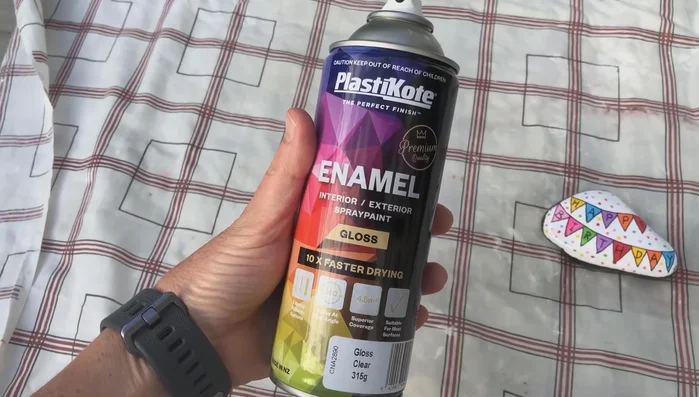
- Sealer (exterior grade spray varnish)
- Adult supervision is required at all times, especially when painting rocks and during the treasure hunt. Young children should not handle paints unsupervised.
- Use non-toxic paints specifically designed for outdoor use and ensure they are completely dry before hiding the rocks to prevent smudging or harming the environment.
- Only hide rocks in safe, accessible locations. Avoid hiding them near roads, water bodies, or areas where they might be accidentally ingested by animals.
Step-by-Step Instructions
Rock Selection and Preparation
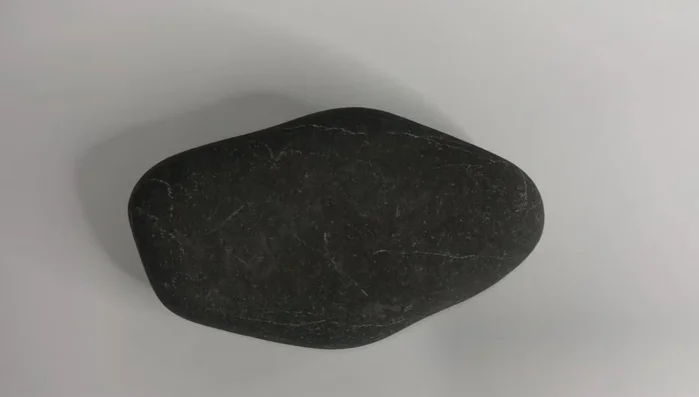
- Select a wide rock for the 'Happy Birthday' lettering. A smooth surface and flat face make painting easier.
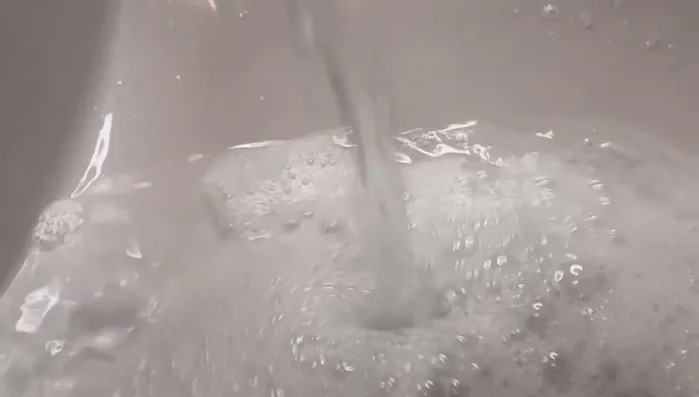
- Wash the rock with warm soapy water, let it dry, and apply two base coats of white acrylic paint for vibrant colors.

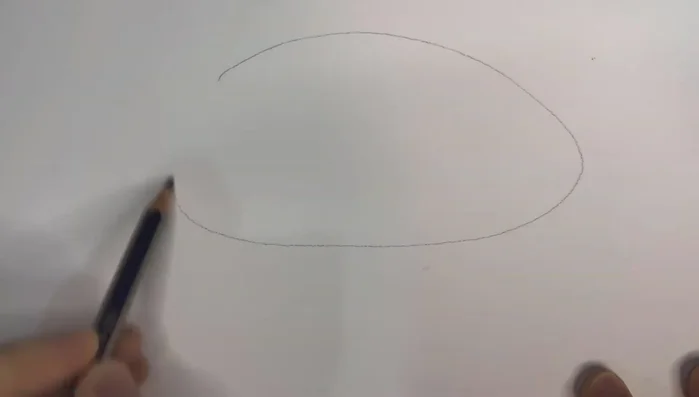
Rock Selection and Preparation Design Sketching
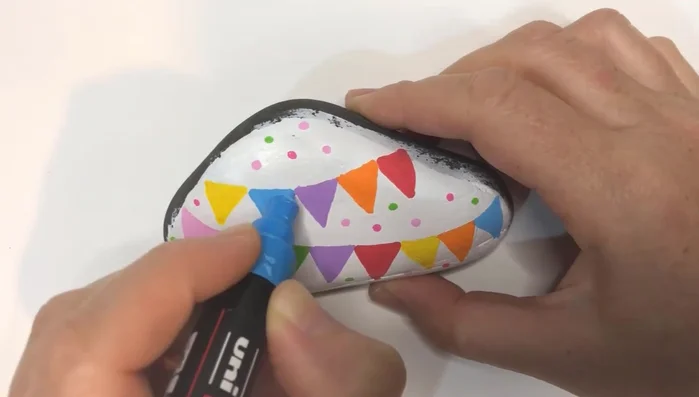
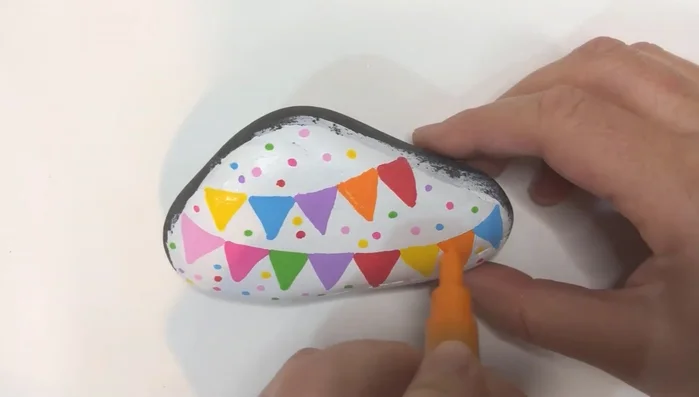
- Sketch two curved string lines on the rock, then draw triangles for each letter (5 for 'Happy', 8 for 'Birthday'). Evenly space the triangles using halfway marks.
Design Sketching Painting the Bunting
- Paint the triangles with your chosen colors. Apply a second coat for brighter colors, especially for lighter shades.
Painting the Bunting Adding Polka Dots
- Add colorful polka dots randomly around the rock for a playful touch.
Adding Polka Dots Outlining the Design
- Outline the string lines, triangles, and letters with a fine black paint pen.
Outlining the Design Sealing the Rock
- Seal the painted rock with two coats of exterior grade, non-yellowing spray varnish with UV stabilizers, allowing 20 minutes drying time between coats.
Sealing the Rock
Read more: DIY Story Stones: Budget-Friendly Sensory Play for Kids
Tips
- Don't worry about being too careful when painting; the black outline will tidy up any imperfections.
- If paint pens don't flow smoothly, pump them on paper to increase paint flow.
- Apply sealer outdoors in a well-ventilated area with a drop cloth underneath. Use light coats to avoid running.