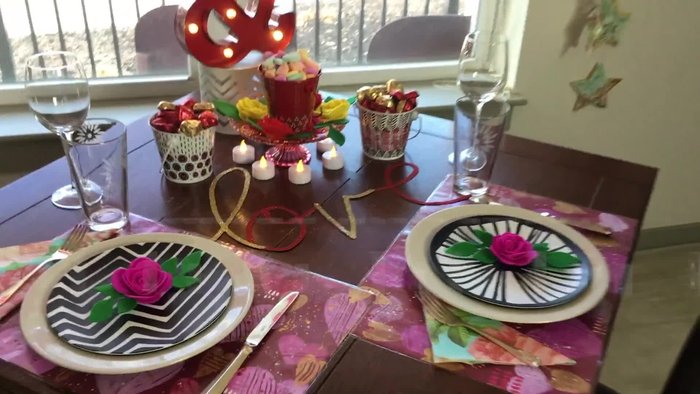
Valentine's Day is a time for romance, but it's also a perfect opportunity to unleash your creativity and personalize your celebrations. Forget generic store-bought decorations; this year, let's create something truly unique and heartfelt: DIY stamped placemats! These charming placemats are not only a fun and festive addition to your Valentine's Day dinner table but also a wonderful handmade gift for loved ones. Using readily available materials and simple techniques, you can craft beautiful placemats that reflect your individual style and add a touch of personalized warmth to your romantic meal.
Transform plain fabric into adorable, personalized placemats with this easy-to-follow, step-by-step guide. We'll explore various stamping techniques, from using simple heart shapes to creating intricate patterns, offering plenty of inspiration to personalize your design. Get ready to unleash your inner artist and create stunning placemats that will be cherished long after Valentine's Day is over.
Preparation and Safety Guidelines
- Scan and Cut machine (or scissors)
- Silicone sheet (or foam, hard stamp)
- Deep cup blade
- Acrylic paints
- Brayer (2in rubber brayer recommended)
- Plastic fork
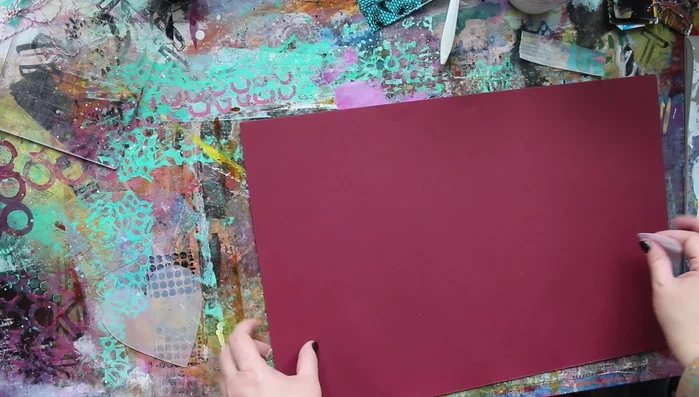
- Canon colored paper
- Gold paint
- White acrylic paint
- Soft round brush
- Iron-on vinyl
- Iron
- Always supervise children when using carving tools or stamps. Sharp objects can cause injury.
- Ensure your work surface is protected from ink stains. Use a dedicated crafting mat or newspaper.
- Allow ink to dry completely before using the placemats to avoid smudging or transferring the design.
Step-by-Step Instructions
Stamp Creation
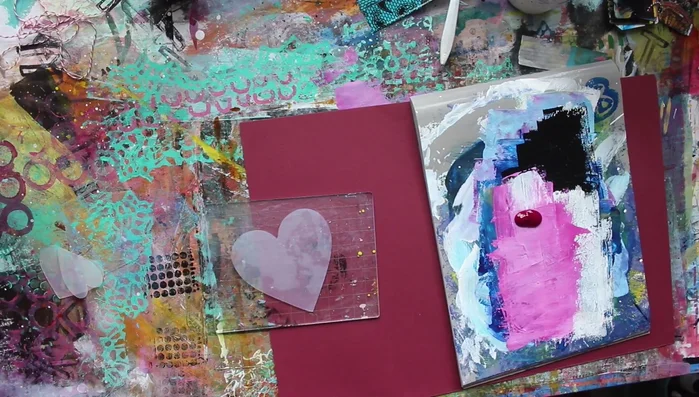
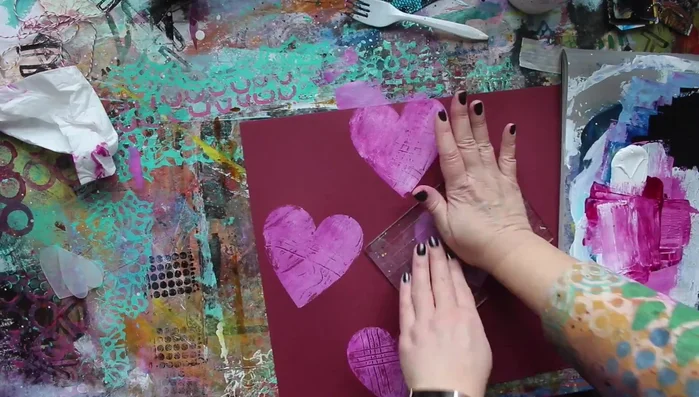
- Create your stamp design using a Scan and Cut machine and deep cup blade, or cut out an existing stamp or create one from silicone, foam, or another material.

Stamp Creation Prepare Materials
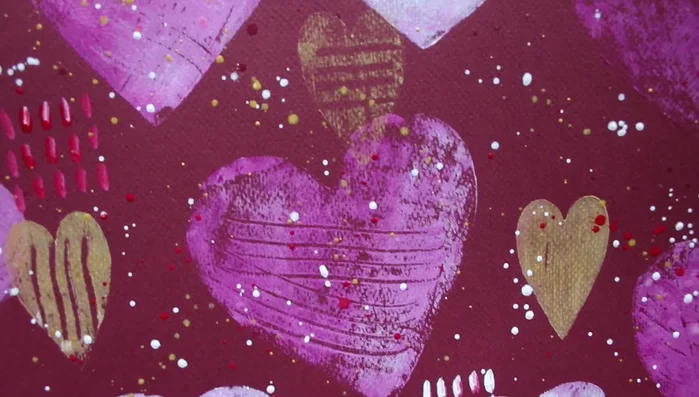
- Prepare your Canon colored paper. This paper offers a nice texture.
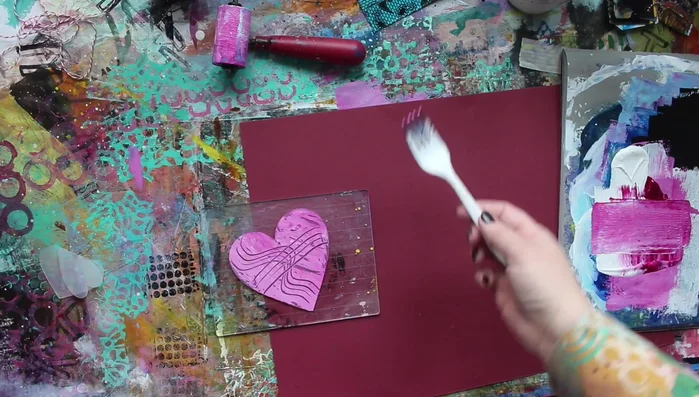
Prepare Materials Mix & Apply Paint
- Mix acrylic paints (e.g., pink and white) to achieve your desired color. Apply the paint onto the stamp using a brayer.
Mix & Apply Paint Stamp & Texture with Fork
- Use a plastic fork to create textured lines on the stamped design while the paint is wet. Less paint leads to cleaner lines.
- Repeat the stamping process, adjusting the paint amount for desired results. The foam underneath the paper acts as a cushion.
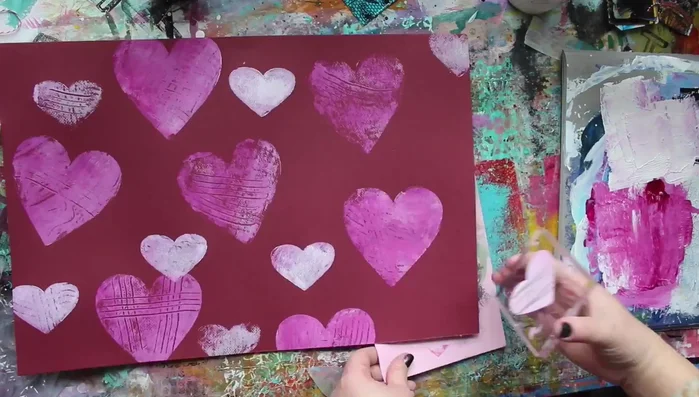
Stamp & Texture with Fork Complete Stamping Pattern
- Completely cover the paper with stamped designs using different stamp sizes and shapes.
Complete Stamping Pattern Clean Up
- Clean stamps with baby wipes.
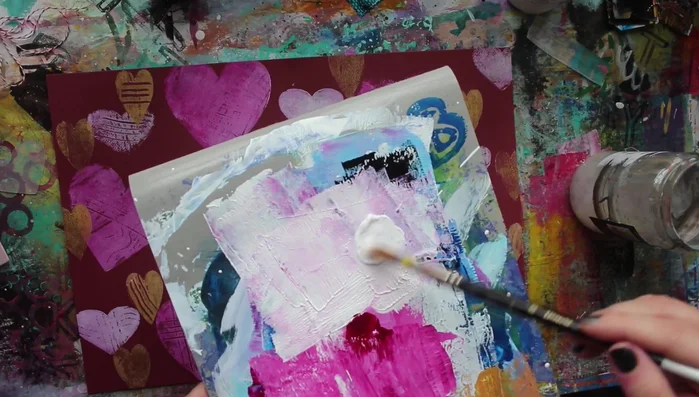
Clean Up Add Gold Accents
- Use a smaller stamp with gold paint to add additional design elements.
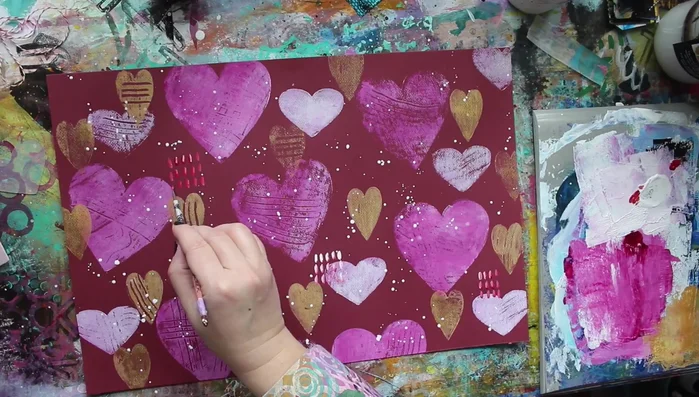
Add Gold Accents Add White Splatter & Details
- Add water to white acrylic paint and use a soft round brush to create splatters for added texture and vibrancy.
- Use a small brush to add simple lines or other details.
Add White Splatter & Details Dry the Placemat
- Let the paint dry completely.
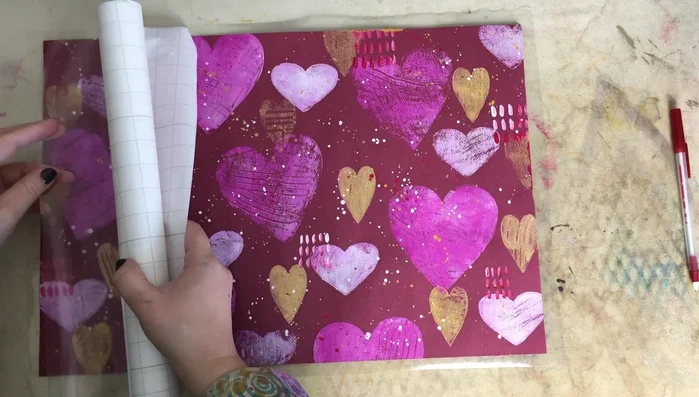
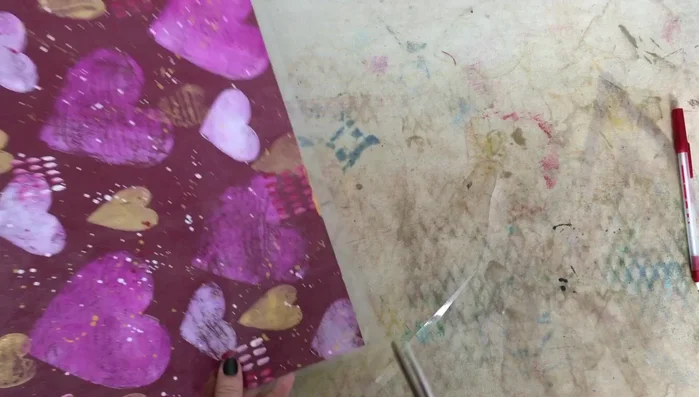
Dry the Placemat Apply & Trim Vinyl
- Apply iron-on vinyl to both sides of the paper. Iron the vinyl to adhere it.
- Trim the excess vinyl.
Apply & Trim Vinyl


Read more: DIY Dollar Store Ghost Candy Holder: Spooky Cute Halloween Decor!
Tips
- Using less paint helps create cleaner prints, especially when aiming for detailed fork designs to show through.
- The foam underneath the paper provides a cushion and helps with stamping.
- Clean stamps easily with baby wipes.
- Consider using clear iron-on vinyl for lamination for durability. Alternatively, you can have it laminated at a copy center.