Upcycling is more than just a trend; it's a creative revolution, transforming discarded materials into beautiful and functional objects. This project perfectly embodies that spirit, showcasing how easily you can turn discarded plastic bottles into stunning, marbled picture frames. Forget expensive store-bought frames; this DIY project offers a unique, eco-friendly, and incredibly affordable alternative. The mesmerizing marbled effect adds a touch of elegance, making these frames a perfect addition to any home décor style, from minimalist to eclectic. Imagine the satisfaction of creating something beautiful from something that would otherwise end up in a landfill.
The process is surprisingly simple and requires minimal tools and materials, mostly things you likely already have at home. Get ready to unleash your inner artist and transform those plastic bottles into personalized masterpieces! Let's dive into the step-by-step instructions and learn how to create your own recycled plastic, marbled picture frames.
Preparation and Safety Guidelines
- Oven (dedicated to plastics)
- Panini press (or similar heat press)
- Baking tray
- Fortissip bottles (or similar white plastic)
- Milk bottle tops (or similar blue plastic)
- Mallet
- Sharp chisel
- Table saw
- Triton thicknesser (or similar planer)
- Scroll saw (or jigsaw/coping saw)
- Card scraper
- Bottle jack press (or clamps)
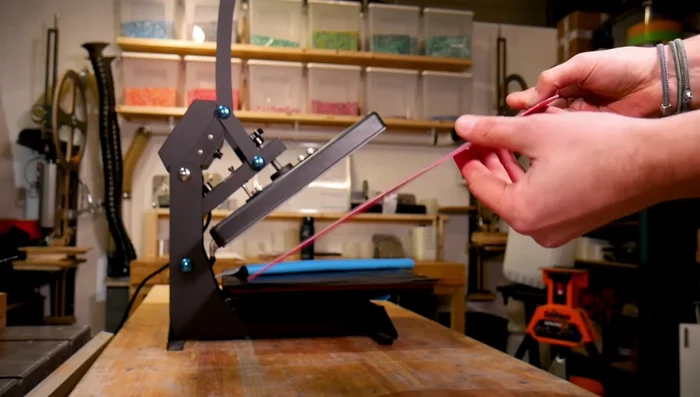
- T-shirt press
- Sharp knife
- Small nails
- Picture wire
- Always supervise children during this project. Sharp objects and hot glue may be involved.
- Ensure plastic is thoroughly cleaned before use to remove any potential harmful residues.
- Use appropriate safety glasses when cutting or working with sharp tools.
Step-by-Step Instructions
Plastic Preparation and Melting
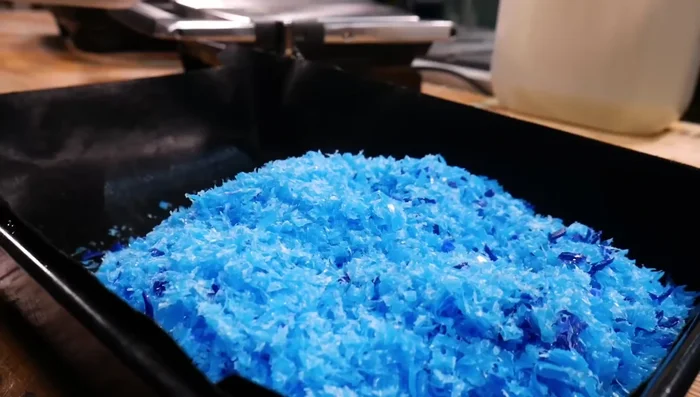
- Shred blue and white plastics.
- Load shredded plastic onto baking tray and melt in a dedicated oven.
- Melt white plastic (Fortissip bottles) in a panini press for a marbled effect.

Plastic Preparation and Melting Marbling and Slab Creation
- Layer the melted plastics, twisting and folding to create a marbled effect. The creators state they prefer to combine the melted masses at this stage for better marble control.
- Use a bottle jack press (or clamps) to create a flat, even slab.
Marbling and Slab Creation Slab Refinement
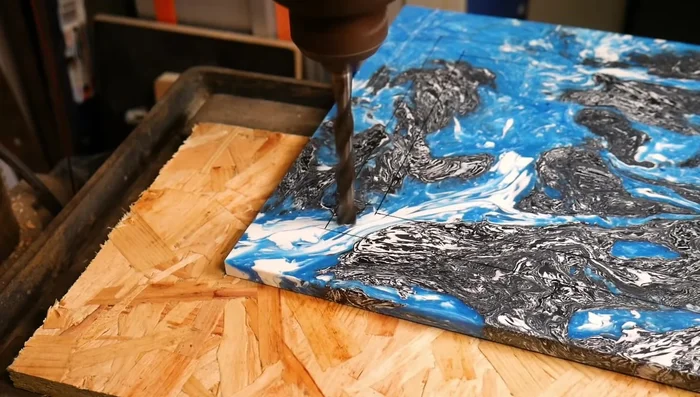
- Use a mallet and chisel to remove high points, then use a table saw to square up the slab. Use a Triton thicknesser to create a smooth, flat surface.
Slab Refinement Frame Cutting and Finishing
- Mark the desired size, then cut the frame using a scroll saw (or jigsaw/coping saw). Clean up with a chisel.
Frame Cutting and Finishing Groove and Backing
- Route a groove around the inside edge to hold the photo.
- Trim a thin sheet of pink plastic (from t-shirt press) or repurpose an old frame's back to fit the groove.
Groove and Backing Assembly and Finishing Touches
- Attach the backing with small nails and add hanging wire.
Assembly and Finishing Touches


Read more: DIY Dollar Store Ghost Candy Holder: Spooky Cute Halloween Decor!
Tips
- Use a dedicated oven for melting plastics; do not use your cooking oven.
- Panini presses offer faster melting due to direct heat contact.
- Collect and reuse plastic scraps for future projects.
- The scroll saw creates less waste when cutting the frame.