The magic of Christmas often involves transforming the ordinary into something extraordinary. This year, let's embrace that spirit with a fun and surprisingly simple science experiment: shrinking plastic cups into miniature Christmas ornaments! This project is perfect for families, classrooms, or anyone looking for a unique and festive craft that combines creativity with a dash of scientific wonder. We'll be harnessing the power of heat to dramatically alter the shape and size of everyday plastic cups, turning them into charming, personalized decorations to hang on your tree.
Beyond the impressive visual transformation, this experiment offers a fascinating glimpse into the properties of plastics and how they react to extreme temperatures. Prepare to be amazed as your ordinary plastic cups shrink and curl into surprisingly intricate shapes, ready to be decorated and cherished. Ready to turn your plastic cups into festive ornaments? Let's dive into the step-by-step process!
Preparation and Safety Guidelines
- 5 oz plastic cups (number six recycled plastic)
- Sharpies (multiple colors)
- Bowl
- Cookie sheet
- Parchment paper
- Always supervise children closely during this experiment. The hot water and sharp tools (if used for trimming) present risks.
- Use oven mitts or tongs when handling hot cups and water to prevent burns.
- Ensure adequate ventilation when heating the water and cups to avoid inhaling fumes.
Step-by-Step Instructions
Design the Cups
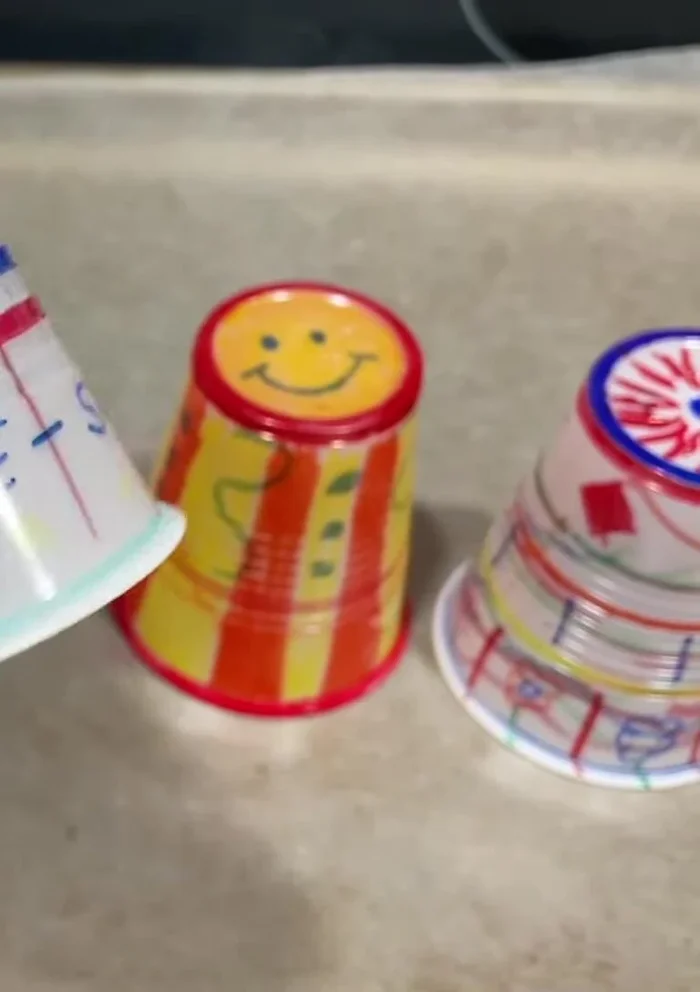
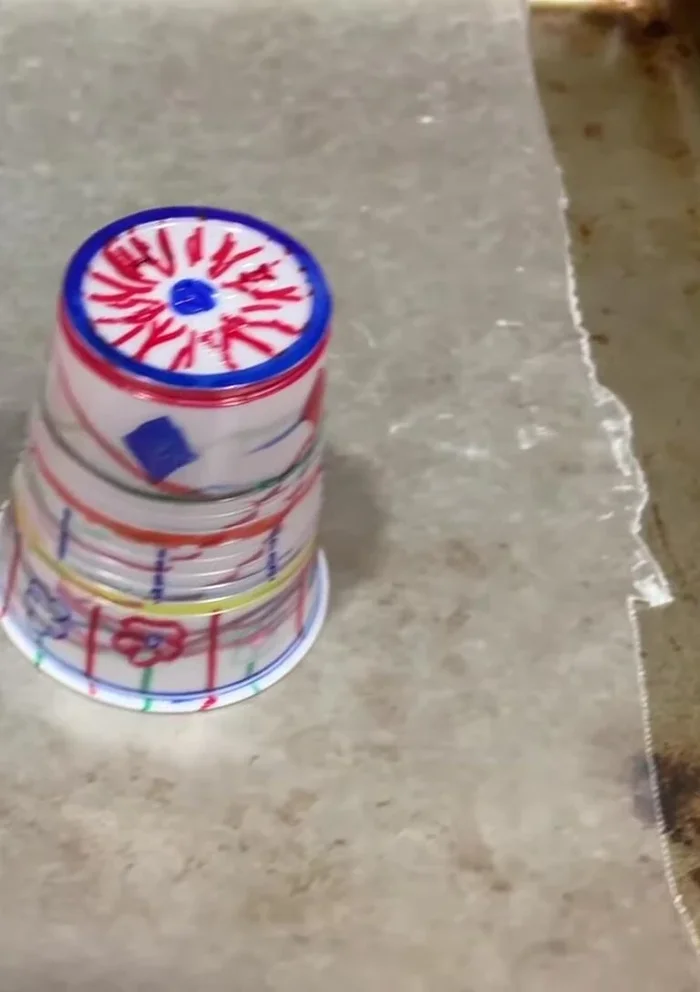
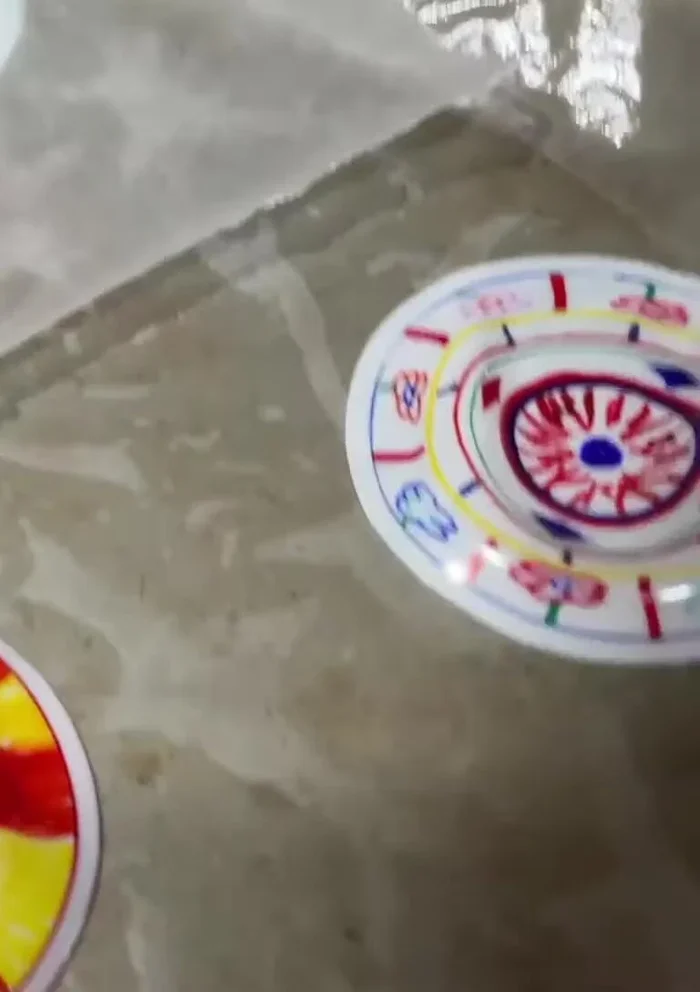
- Design the 5 oz plastic cups. Decorate both the inside and outside for a complete design.

Design the Cups Preheat Oven
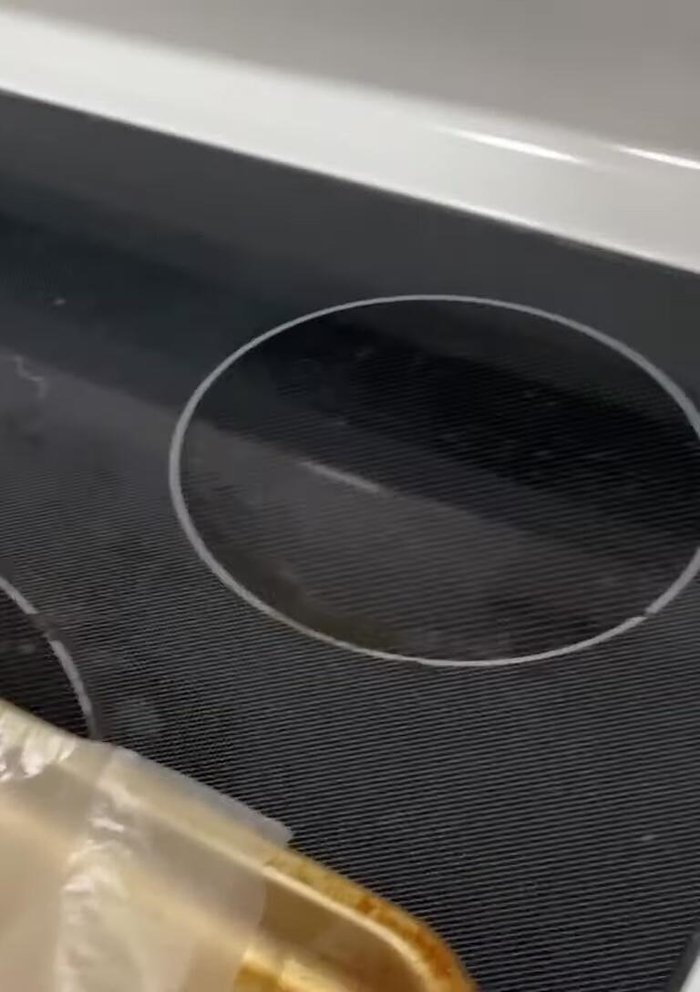
- Preheat oven to 425°F (220°C).
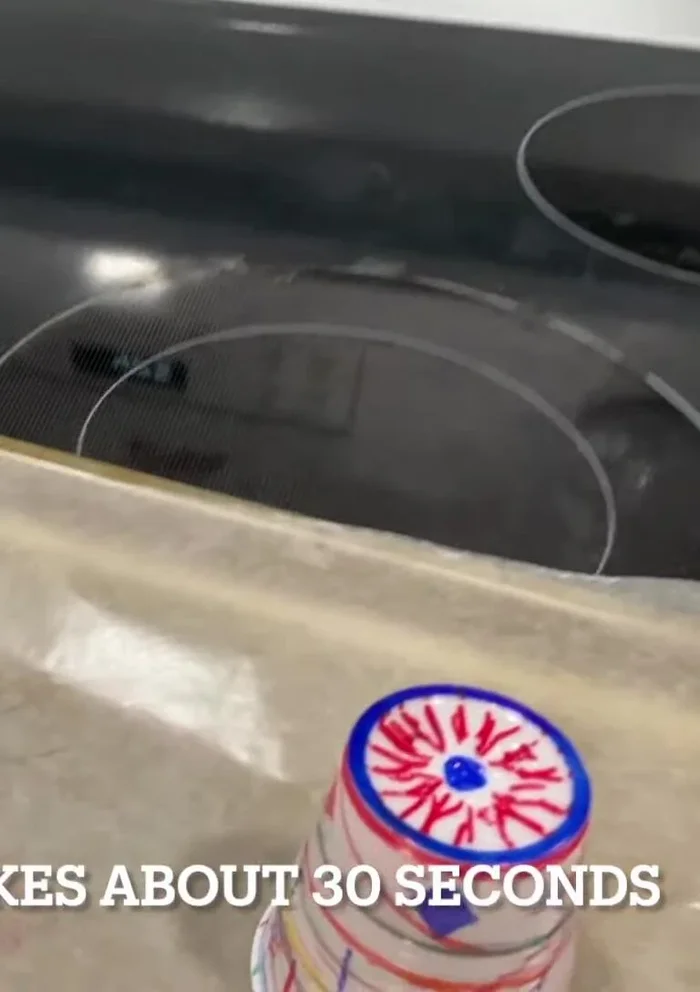
Preheat Oven Shrink the Cups in the Oven
- Place the designed cups into the preheated oven for about 30 seconds, checking frequently (every 10-12 seconds).
Shrink the Cups in the Oven Flatten the Cups
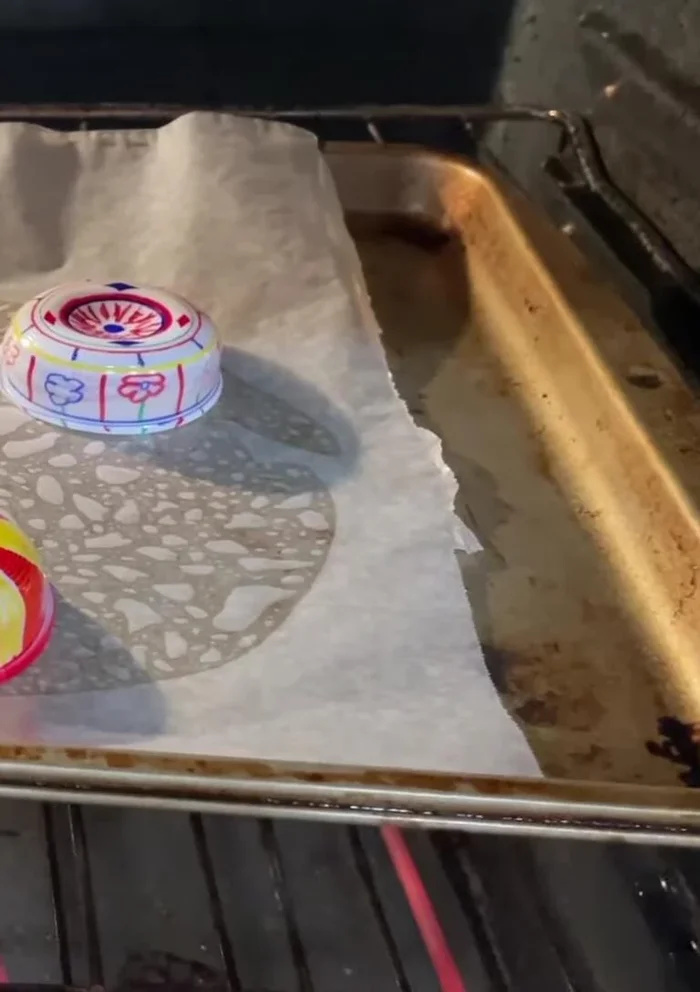
- Once the cups are softened and slightly shrunk, remove them from the oven immediately.
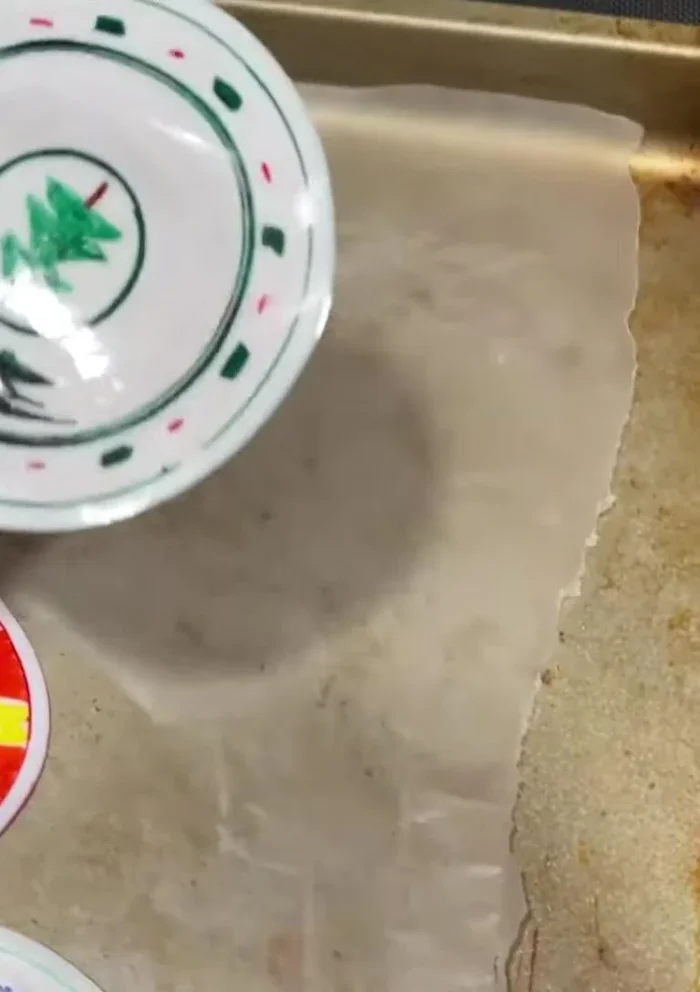
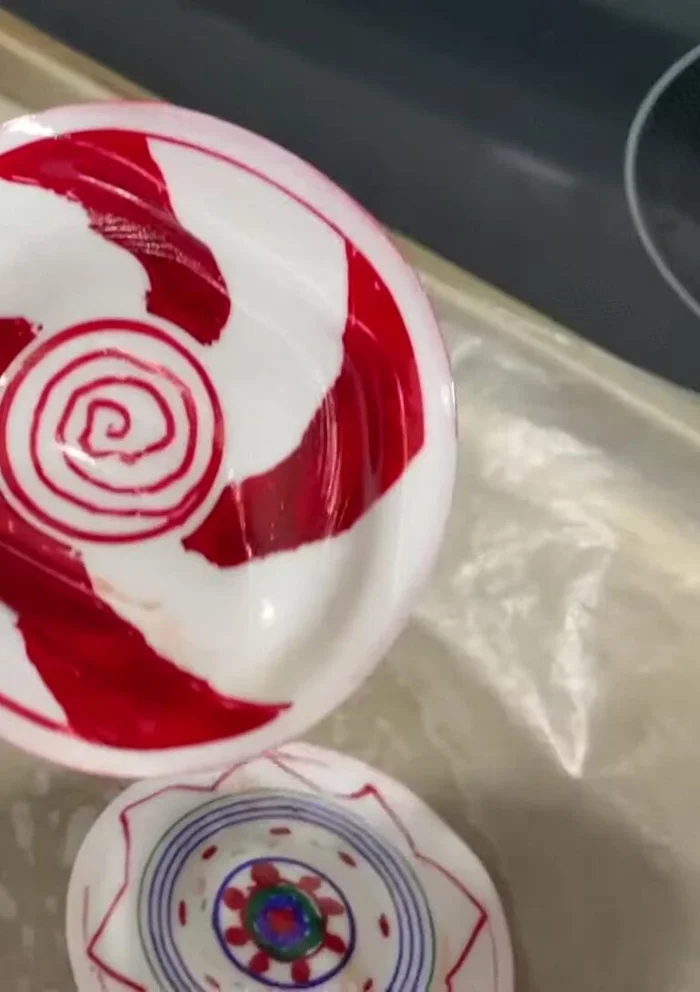
- Place parchment paper on a flat surface. Place a softened cup on top of the parchment paper. Press down firmly with a bowl to flatten the cup completely. A knife may be needed to help release any trapped air or plastic.
- Repeat steps 4 and 5 until all cups are flattened.
Flatten the Cups Cool and Finish
- Allow the flattened cups to cool completely.
- Punch a hole in the top of each flattened cup to add a tree hook or keychain ring.
Cool and Finish
Read more: DIY Dollar Store Ghost Candy Holder: Spooky Cute Halloween Decor!
Tips
- Use number six recycled plastic 5 oz cups; clear plastic cups don't work.
- Design both the inside and outside of the cups for a more complete and colorful ornament.
- Use parchment paper to prevent ink from transferring to the cookie sheet or bowl.
- Be careful; the cups are very hot when removed from the oven.