Transform your space into a whimsical wonderland with this delightful DIY tassel and pom-pom garland! Perfect for adding a touch of festive cheer to any occasion, from birthdays and holidays to everyday celebrations, this charming garland is surprisingly easy to create. Forget expensive store-bought decorations; this project allows you to unleash your creativity and personalize your decor with a vibrant explosion of color and texture. Imagine the playful bounce of the pom-poms and the elegant sway of the tassels, creating a captivating visual feast. The best part? You'll be amazed at how quickly you can whip up this stunning garland using readily available materials.
This simple yet effective craft project is ideal for both beginners and seasoned crafters alike, promising a fun and rewarding experience. Whether you choose classic color schemes or boldly experiment with vibrant hues, the results are guaranteed to impress. Ready to bring some handmade happiness to your home? Let's dive into the step-by-step instructions to create your own unique tassel and pom-pom garland.
Preparation and Safety Guidelines
- Tissue paper
- Ruler
- Paper knife
- Glue
- Pack thread
- Always supervise children when crafting. Small parts like beads and pom-poms pose a choking hazard.
- Use sharp scissors with caution and keep them away from children. Adult supervision is crucial during cutting.
- If using hot glue, work in a well-ventilated area and be mindful of burn risks. Keep glue guns out of reach of children.
Step-by-Step Instructions
Prepare Tissue Paper
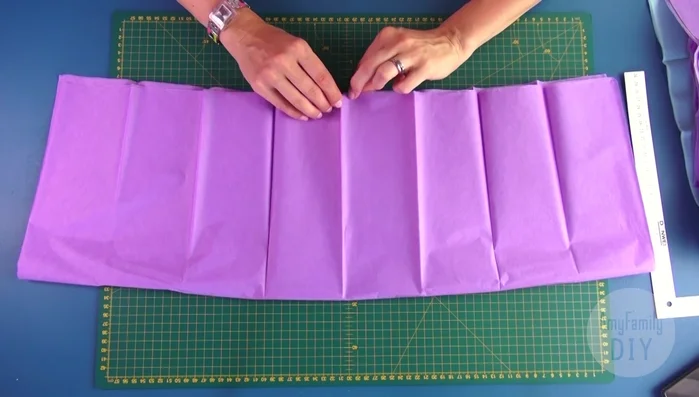
- Unfold tissue paper sheets and divide them into two piles of five sheets each.

Prepare Tissue Paper Cut Tissue Paper Strips
- Fold one pile in half and cut through all layers to create strips.
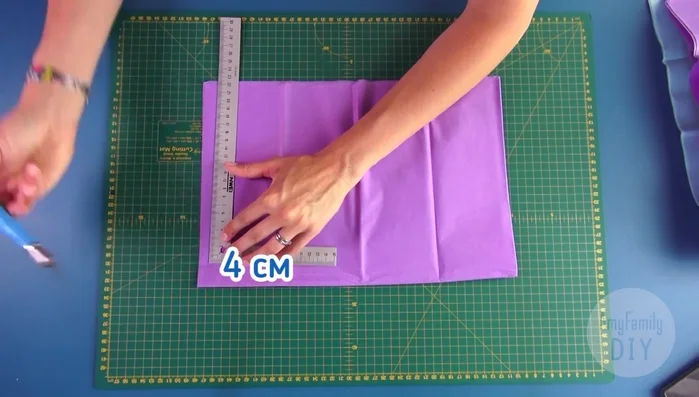
- Cut the tissue layers into 1cm wide stripes, 4cm away from the edge.
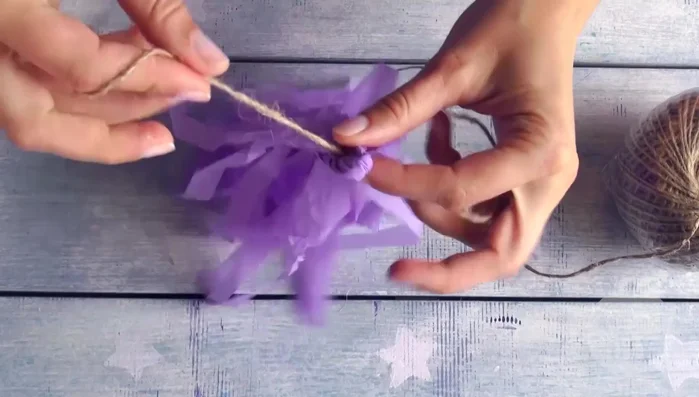
Cut Tissue Paper Strips Make a Tassel
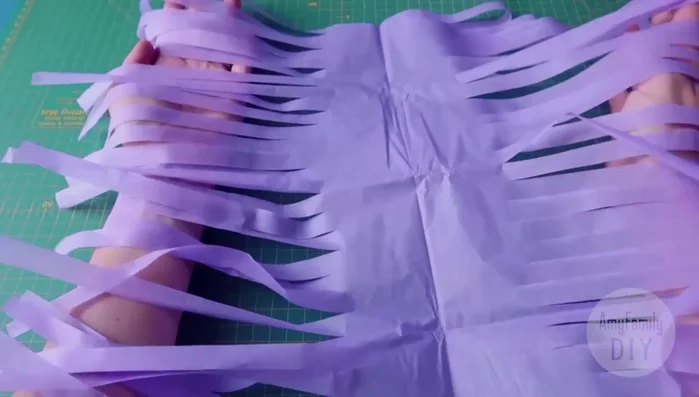
- Unfold a piece of tissue paper. Lift the bottom edge towards the top, repeating the move without matching edges.
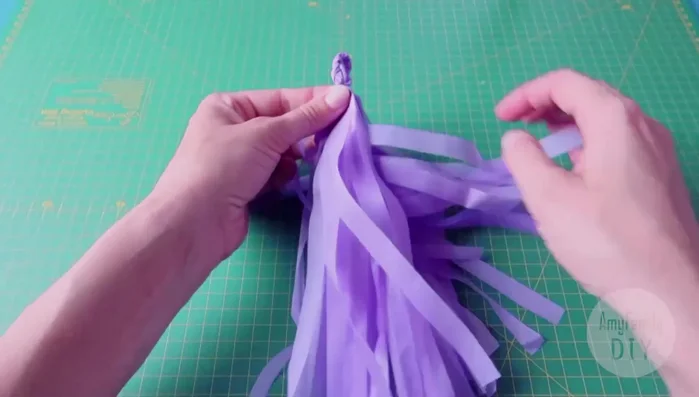
- Roll the tassel from the bottom and twist the even part tightly.
- Fold the tassel in half and secure it with glue.
Make a Tassel Assemble Garland
- Attach tassels to the pack thread using glue.
Assemble Garland


Read more: DIY Picture Frame from Oat Cartons and Fabric: A Simple & Unique Craft
Tips
- Make sure the edges of the tissue paper sheets match when cutting stripes.
- Twist the tassel tightly for a neat finish.
- Use hot glue to securely attach the tassels, allowing 20 seconds for it to set.