Always dreamed of swimming like a mermaid? Transform that fantasy into reality with this easy and affordable DIY mermaid tail tutorial! Forget expensive, store-bought tails; this guide shows you how to create your own stunning mermaid tail using readily available materials and simple techniques. You'll be amazed at how achievable this magical project is, even on a budget. Say goodbye to pricey costumes and hello to a shimmering, personalized creation that’s uniquely yours.
This tutorial prioritizes simplicity and affordability, focusing on a method that minimizes cost and complexity. We’ll walk you through each step, from gathering materials to the final touches, ensuring a successful and beautiful mermaid tail. Ready to dive in and create your own underwater masterpiece? Let's begin with the step-by-step instructions below!
Preparation and Safety Guidelines
- Plastic storage container lid
- Xacto knife/Utility knife
- Old flip-flops
- E6000 glue
- Duct tape (optional)
- Swimsuit fabric
- Wrapping paper/Large paper
- Elastic
- Safety pin
- Sewing machine/needle and thread
- Never swim alone while wearing your mermaid tail. Always have a responsible adult present, especially in deep water or strong currents.
- Ensure your tail fits snugly but allows for comfortable movement and breathing. A tail that's too tight can restrict your breathing and movement, creating a dangerous situation.
- Only use your mermaid tail in shallow, calm waters suitable for swimming. Avoid wearing it near rocks, sharp objects, or strong currents.
Step-by-Step Instructions
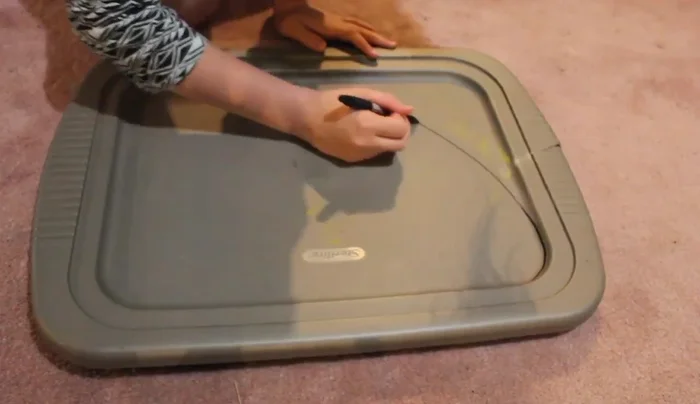
Create the Monofin
- Cut a fin shape from a plastic storage container lid using a sharp knife. This is the most crucial part of the process.

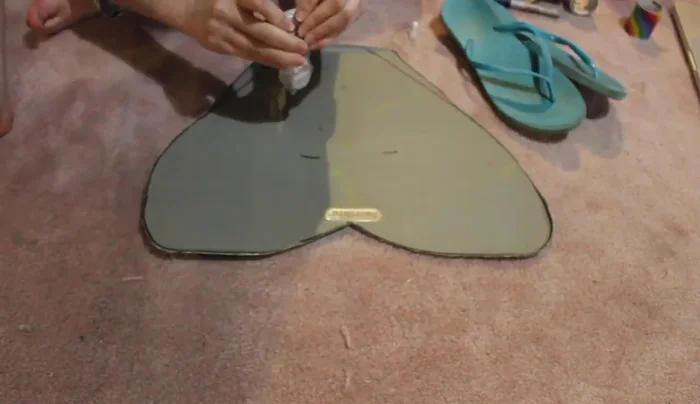
Create the Monofin Attach and Reinforce Monofin
- Glue old flip-flops to the monofin using E6000 glue for a secure bond (recommended over hot glue for water resistance).
- Cover the monofin sides with duct tape to prevent scratching.
- Glue leftover fabric over the monofin for added protection and aesthetics.
Attach and Reinforce Monofin Create Tail Pattern
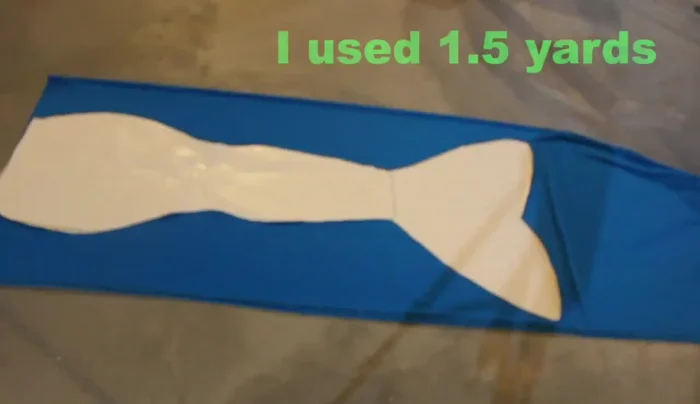
- Trace around your legs and monofin onto a large piece of paper.
Create Tail Pattern Cut and Sew Tail Fabric
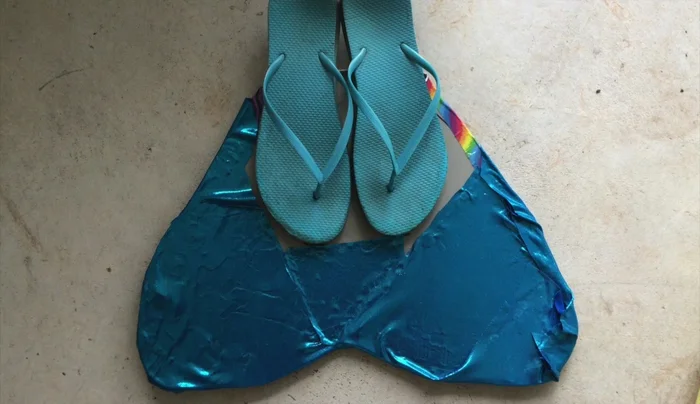
- Cut out the tail pattern from your chosen swimsuit fabric.
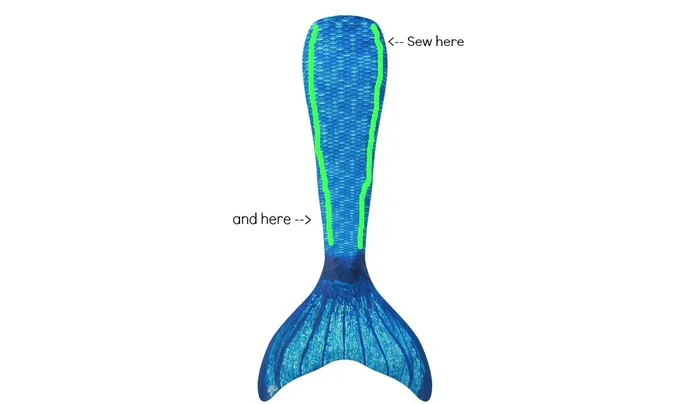
- Sew the two fabric pieces together using a zigzag stitch, leaving the top edge and bottom open for elastic and monofin insertion.
Cut and Sew Tail Fabric Add Elastic Waistband
- Create a tunnel at the top edge and thread elastic through it, then sew it closed.
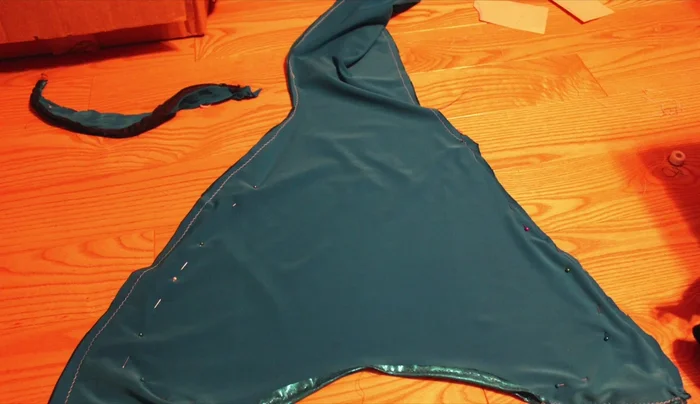
Add Elastic Waistband Attach Monofin to Tail
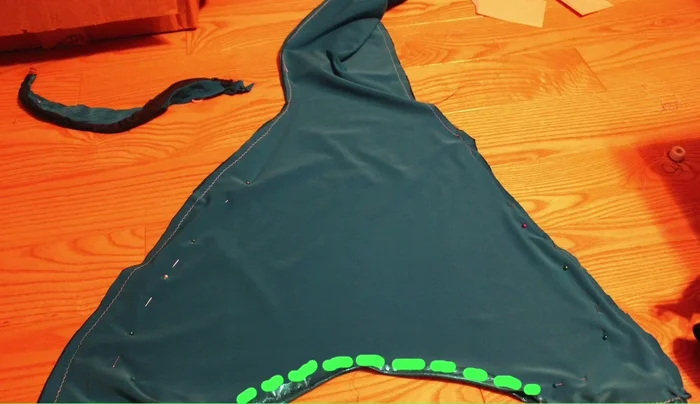
- Place the monofin inside the tail, pin for fit, and sew around it, leaving the bottom open.
Attach Monofin to Tail Finish Tail
- Hem the unsewn bottom edge of the tail.
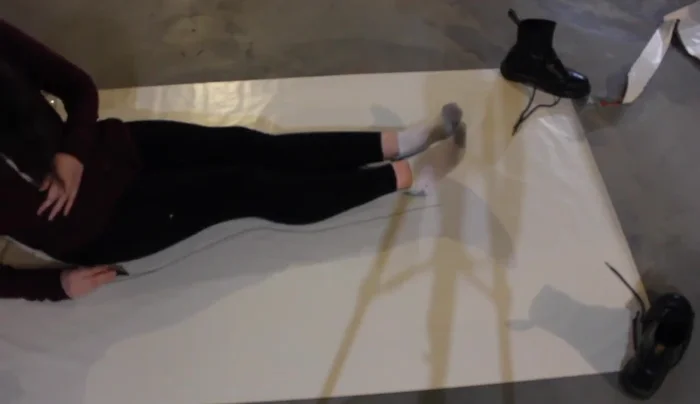
- Turn the tail right side out and try it on.
Finish Tail


Read more: DIY Picture Frame from Oat Cartons and Fabric: A Simple & Unique Craft
Tips
- Use E6000 glue for the flip-flops and monofin—it offers superior water resistance compared to hot glue.
- Take your time cutting the monofin from the plastic lid, especially if you're younger; ask an adult for help.
- When attaching the elastic waistband, make it slightly snug for a secure fit.