Baby headbands are undeniably adorable, adding a touch of sweetness and style to any little one's outfit. But store-bought headbands can be surprisingly expensive, and finding the perfect color or pattern to match your baby's wardrobe can be a frustrating search. Why not skip the hassle and the hefty price tag? Creating your own DIY baby bow headbands is easier than you think, allowing you to personalize them perfectly and save money in the process. With just a few simple materials and a bit of patience, you can craft charming headbands that will make your baby the cutest in the room.
This tutorial provides a straightforward, step-by-step guide to sewing your own adorable baby bow headbands, perfect for beginners. From choosing your fabric and measuring the headband to attaching the bow securely, we’ll walk you through each stage, ensuring you achieve professional-looking results. So grab your sewing supplies, and let's get started!
Preparation and Safety Guidelines
- Tape measure
- Fabric
- Clear rubber bands
- Board (e.g., cutting board, clipboard, piece of wood, book)
- Always supervise young children while wearing headbands to prevent choking hazards or entanglement.
- Use only soft, high-quality fabrics and securely fasten any embellishments to avoid scratching or irritating baby's delicate skin.
- Ensure the headband is not too tight to prevent restricting blood flow to the head. A comfortable, snug fit is key.
Step-by-Step Instructions
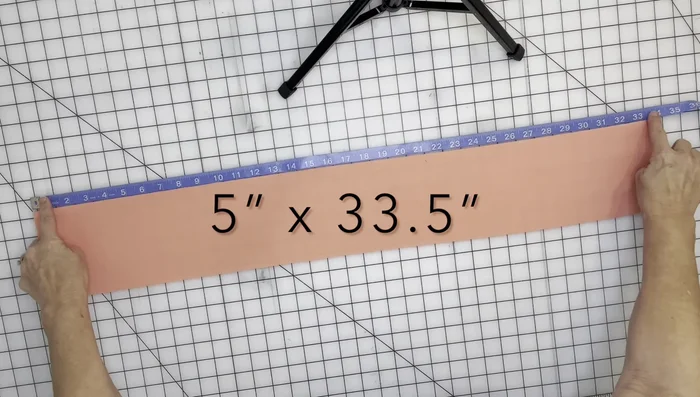
Measure and Cut Fabric
- Measure your baby's head circumference using a tape measure.
- Add 18 inches to the measurement. This will be the length of your fabric.
- Cut your fabric 5 inches wide (or 3 inches for a smaller bow) by the calculated length.

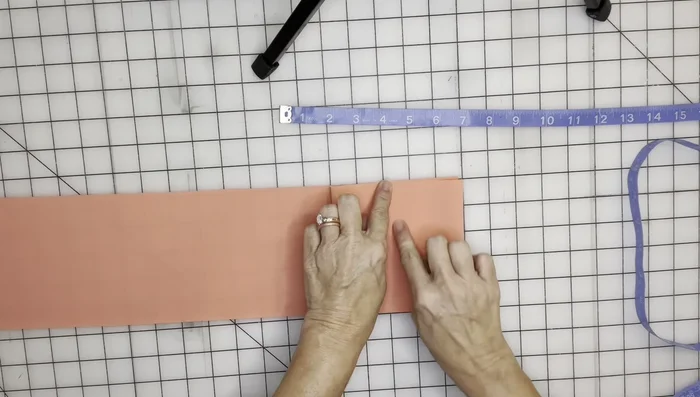
Measure and Cut Fabric Prepare the Fabric for Bow Making
- Find a board that's half the length of your baby's head circumference.
- Fold the fabric in half lengthwise, then in half again, creating 5-inch sections.
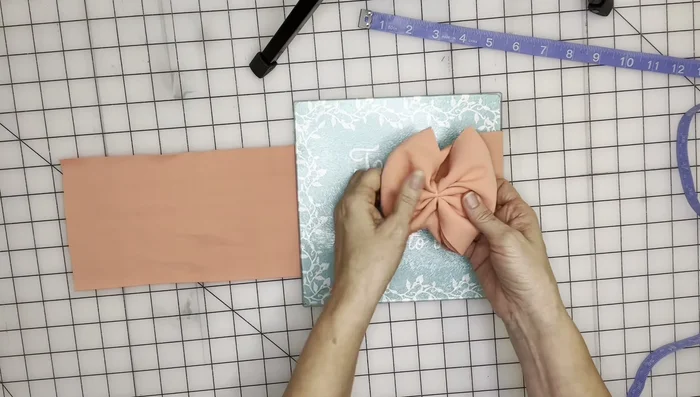
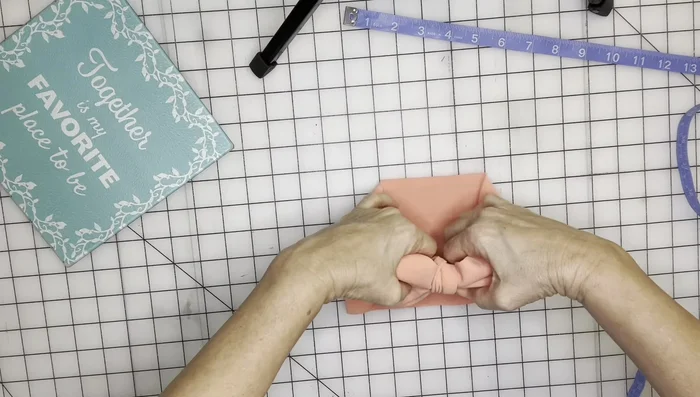
Create the Bow Shape
- Secure the center with a clear rubber band.
- Place the folded fabric (right side down) onto the board. Bring one end of the fabric over and under the bow, tying it securely.
- Use your fingers to hold the bow in place while pulling the fabric tight to create a bow shape. Fold the raw ends in neatly.
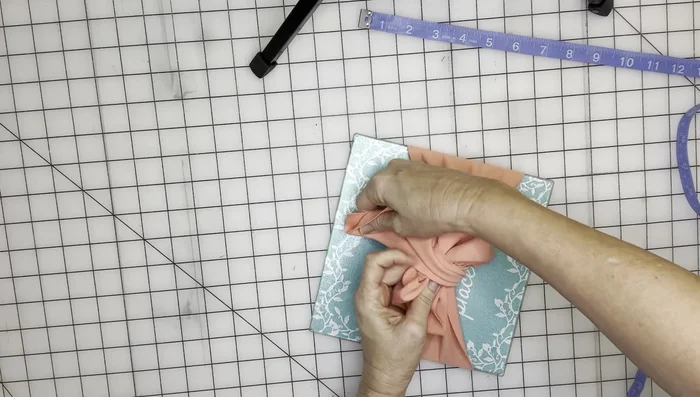
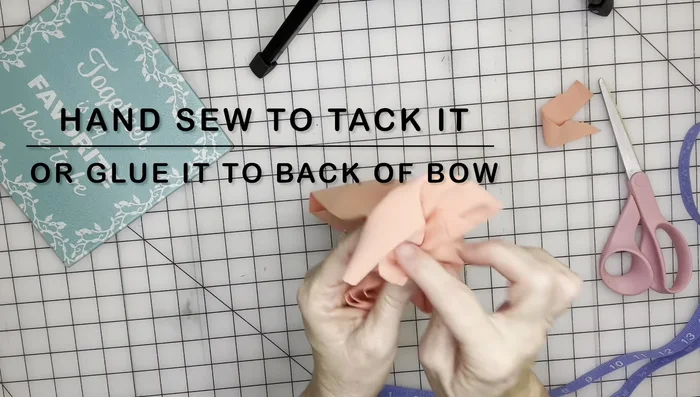
Create the Bow Shape Secure and Finish the Bow
- Wrap the remaining fabric around the center of the bow, creating a hole. Poke the end through the hole and pull it tight.
- Remove the bow from the board, adjusting the size to match half of your baby's head circumference.
- Trim the excess fabric and secure the ends with glue or stitches.
Secure and Finish the Bow
Read more: DIY Picture Frame from Oat Cartons and Fabric: A Simple & Unique Craft
Tips
- Cut the fabric on the stretchiest part (lengthwise) for better fit and a smoother edge.
- Use a rotary cutter for a neater fabric edge.