Ever dreamed of embodying your favorite animal character, but lacked the sewing skills (or the patience!) for elaborate cosplay ears? Forget fiddly stitches and complicated patterns! This tutorial will guide you through creating incredibly realistic-looking animal ears using a completely no-sew method. We'll harness the power of readily available materials like faux fur, craft foam, and hot glue to achieve professional-looking results, perfect for adding that extra touch of authenticity to your next cosplay. Whether you're aiming for the playful perkiness of fox ears or the majestic sweep of a wolf's headwear, this technique is surprisingly versatile.
This no-sew approach means absolutely anyone can participate, regardless of their crafting experience. Forget the frustration of tangled threads and broken needles; we're focusing on a fun, fast, and incredibly effective method. Ready to transform your cosplay game? Let's dive into the step-by-step instructions and bring your animalistic alter ego to life!
Preparation and Safety Guidelines
- Faux fur (two colors)
- 2mm EVA foam
- 12 gauge aluminum wire
- Hot glue gun
- Scissors
- Electric shaver
- Craft knife
- Headband
- Paint
- Hair chalk
- Airbrush (optional)
- Super glue
- Wire cutters
- Pliers
- Always supervise children during crafting. Small parts pose a choking hazard.
- Use craft glue appropriate for the chosen materials. Ensure adequate ventilation when using strong adhesives.
- Be mindful of sharp edges on any craft tools used. Handle with care to avoid injury.
Step-by-Step Instructions
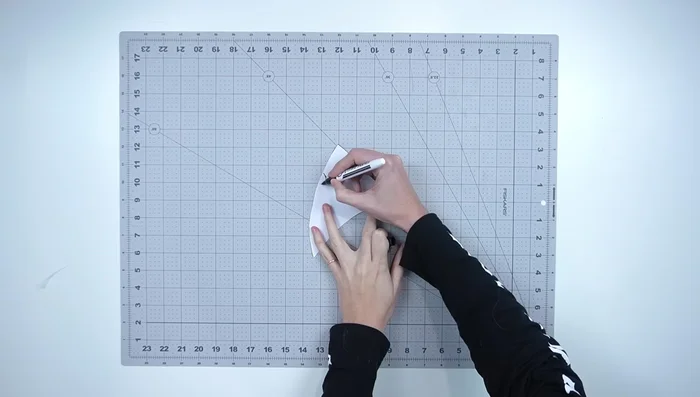
Create Ear Patterns
- Create ear patterns on paper. Adjust size and shape as desired. Pre-made patterns are available on our website.

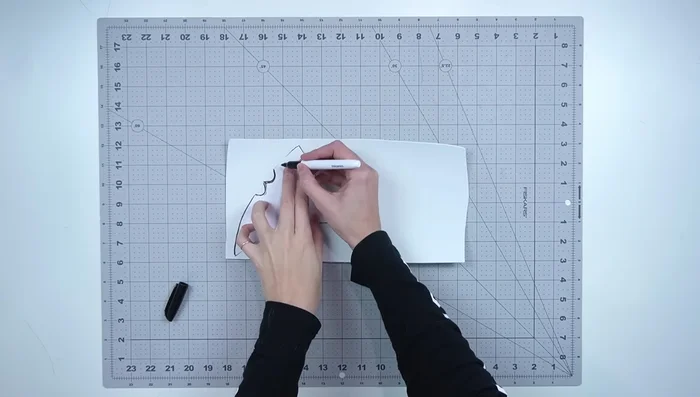
Create Ear Patterns Cut Fur Fabric
- Trace patterns onto the wrong side of your chosen fur fabrics (one color for the front, one for the back). Add 5mm seam allowance.
- Cut out the fur pieces using a craft knife to avoid damaging the fur fibers.
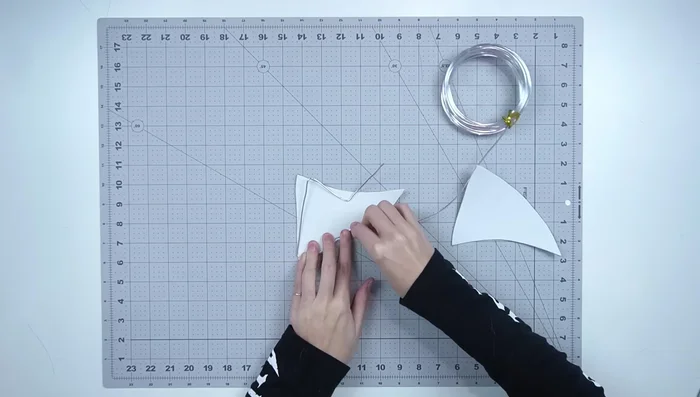
Cut Fur Fabric Create Foam and Wire Frame
- Trace and cut out the ear shapes from 2mm EVA foam.
- Bend and shape aluminum wire to fit the foam ear shapes, leaving long pieces to attach to the headband. Secure the wire to the foam using hot glue.
Create Foam and Wire Frame Attach Fur to Foam
- Glue the black fur (back) to the foam frame, then glue the white fur (front) on top, ensuring a good seal around the edges.
- Trim the excess fur around the edges using scissors.
Attach Fur to Foam Shape and Detail Fur
- Shave the fur using electric clippers to create depth and realism. Shorten the fur on the top and leave the bottom long and fluffy. Shape the inner ear as needed.
Shape and Detail Fur Add Details and Markings
- Use hair chalk and/or paint (and an airbrush, if available) to add details, markings, and shading to the ears for a more realistic look.
Add Details and Markings Attach to Headband
- Attach the ears to a headband by bending and wrapping the excess wire around the headband. Secure with pliers if needed.
Attach to Headband


Read more: DIY Picture Frame from Oat Cartons and Fabric: A Simple & Unique Craft
Tips
- Use a craft knife for precise cutting of fur to prevent damage.
- Keep a vacuum handy while shaving the fur to minimize mess.
- Use pliers to tighten the wires on the headband if needed.