Are you ready to unleash your creativity and craft some seriously cute keychains? This tutorial will guide you through the process of creating personalized keychains using the amazing capabilities of your Brother ScanNCut machine. Fussy cutting, a technique that allows for intricate designs and detailed shapes, is perfectly suited to the ScanNCut's precision and ease of use, making it ideal for crafting unique and delightful accessories. Forget mass-produced keychains; you'll be making personalized gifts in no time!
Imagine the possibilities: from whimsical animals and delicate flowers to bold geometric patterns and personalized monograms, the design options are limitless. This tutorial will show you how to effectively use your ScanNCut's fussy cutting features to transform your favorite designs into charming, durable keychains. Let's dive into the step-by-step process and create something truly special.
Preparation and Safety Guidelines
- Brother ScanNCut
- Fabric
- Cutting Mat
- Fusible Interfacing (Pelons Peles 72F recommended)
- Keychain split rings
- Sewing Machine
- Always use the correct blade and mat setting for your chosen material. Using the wrong setting can damage your machine or cause injury.
- Never leave the ScanNCut unattended while it's cutting. Keep hands and fingers clear of the cutting area at all times.
- Before cutting intricate designs, perform a test cut on a scrap piece of the same material to ensure the blade depth and speed are properly adjusted.
Step-by-Step Instructions
Prepare the Brother ScanNCut
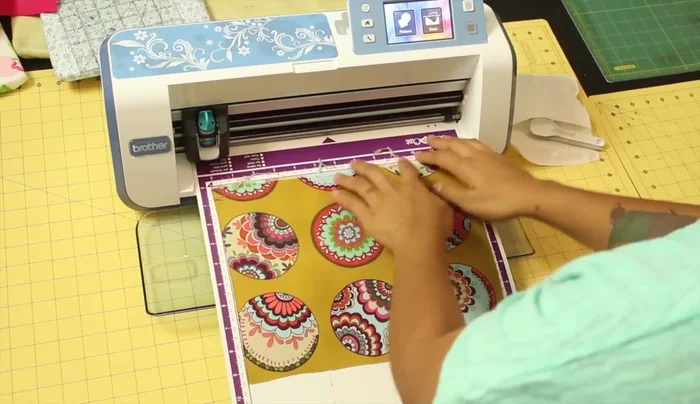
- Prepare your fabric. Stick the fabric onto your cutting mat and press the load mat button.

Prepare the Brother ScanNCut Select and Size the Circle Pattern
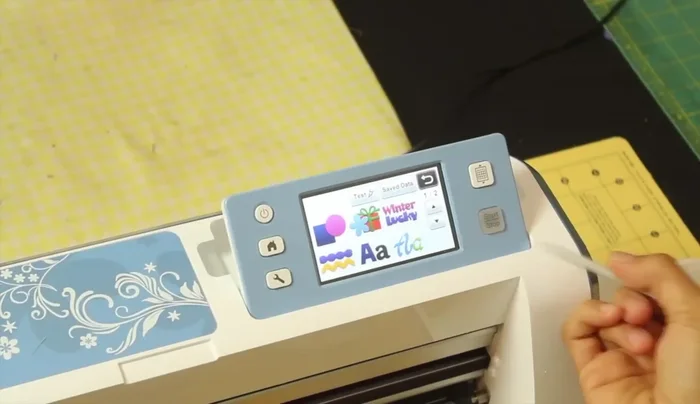
- Access the pattern menu, select shapes, and choose a circle. Adjust the size if needed.
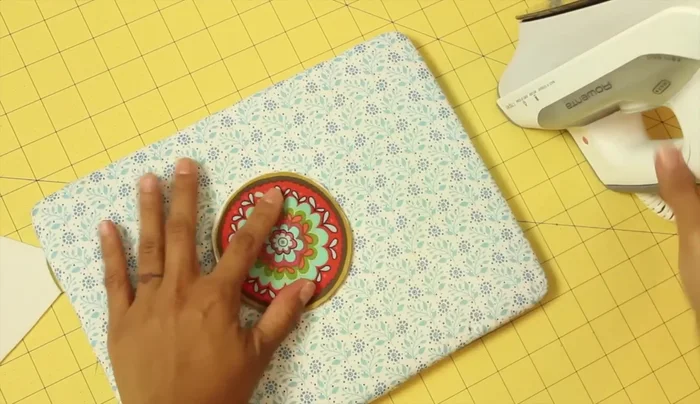
Select and Size the Circle Pattern Fussy Cut with Scan Feature
- Use the Scan feature. The machine will scan your fabric, displaying it on the screen. Adjust the circle to fit your desired motif.
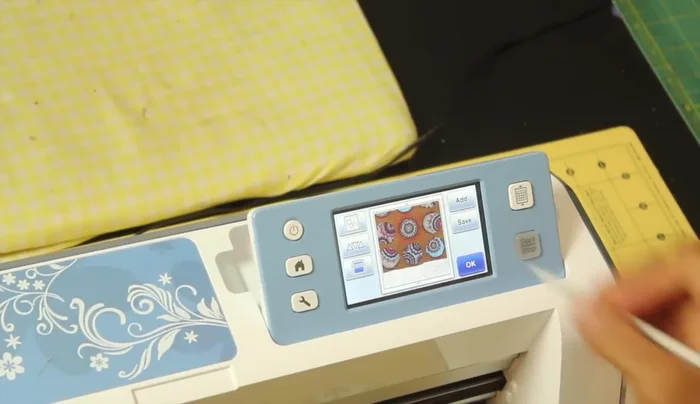
- Position and select the circles you want to cut. Adjust size and quantity if necessary.
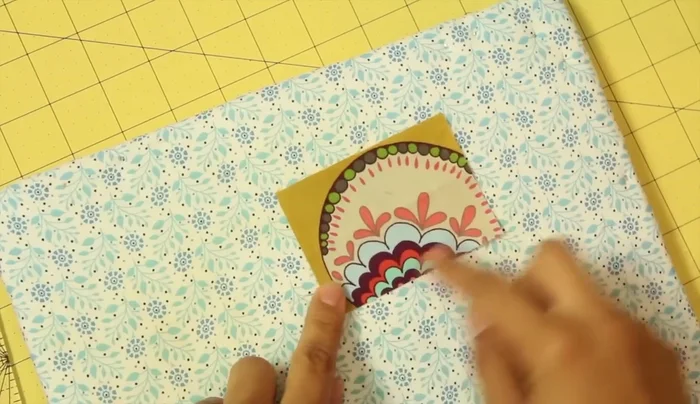
- Select 'cut' and 'set start'. The machine will cut your shapes. Peel off the excess fabric.
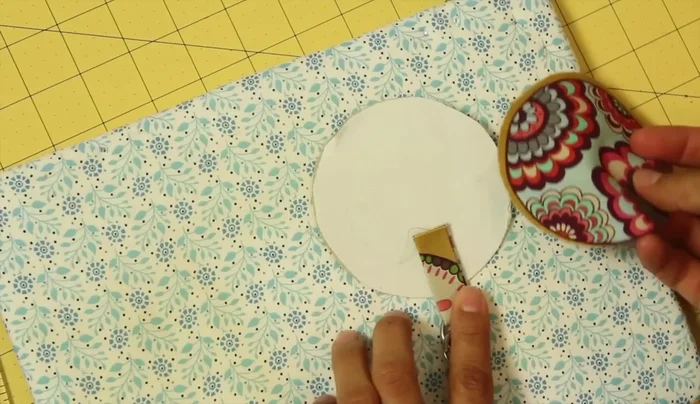
Fussy Cut with Scan Feature Prepare the Interfacing
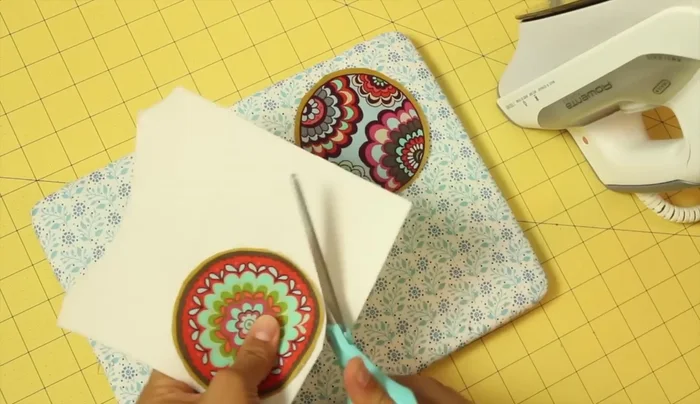
- Cut out one piece of interfacing using your fabric circles as templates.
Prepare the Interfacing Fuse Fabric and Interfacing
- Fuse one fabric circle to the interfacing.
Fuse Fabric and Interfacing Create and Attach the Keychain Loop
- Cut a fabric strip (3 1/2 x 2 1/2 inches), fold in half lengthwise, press. Fold shorter sides into the center crease, press again, and refold to hide raw edges. Slip a keychain split ring through the loop.
- Position the loop on the fused circle, leaving 1/2 to 3/4 inch extending beyond the edge. Fuse in place.
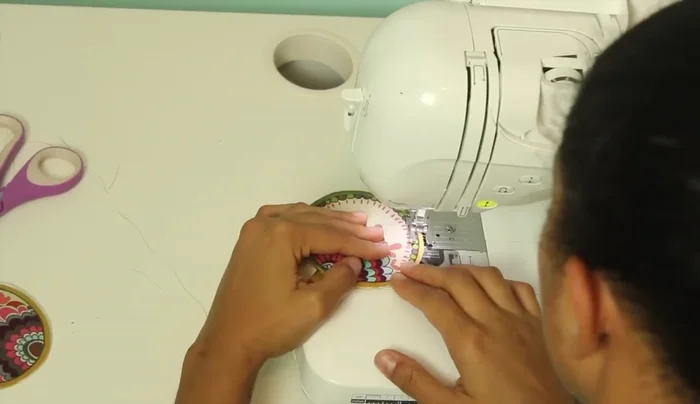
Create and Attach the Keychain Loop Sew and Finish the Keychain
- Stitch around the entire circle to secure the loop and raw edges. Use a tight zigzag stitch.
Sew and Finish the Keychain


Read more: DIY Picture Frame from Oat Cartons and Fabric: A Simple & Unique Craft
Tips
- Use heavyweight fusible interfacing (like Pelons Peles 72F) for a sturdy keychain.
- Stitch slowly and carefully to ensure a neat finish.