For centuries, medieval fortresses stood as symbols of power, resilience, and strategic brilliance. These imposing structures, born from necessity and forged in conflict, represent a pinnacle of architectural and military engineering. From the mighty ramparts of Krak des Chevaliers to the imposing walls of Edinburgh Castle, these fortifications tell tales of sieges endured and battles won, captivating imaginations and inspiring awe. But what exactly went into creating these seemingly impenetrable bastions? What were the crucial design elements and construction techniques that enabled them to withstand centuries of assault?
This guide delves into the intricate process of building your own ultimate medieval fortress, exploring every aspect from initial site selection to the final touches on the battlements. We'll journey through the architectural considerations, the logistical challenges, and the crucial manpower required, providing a comprehensive step-by-step process that will transform your understanding of medieval military architecture. Let's begin!
Preparation and Safety Guidelines
- Stone
- Wood
- Clay
- Tools
- Labor
- **Site Selection is Paramount:** Choose a defensible location with natural barriers like cliffs, rivers, or forests. Accessibility for your troops while being difficult for attackers is key.
- **Resource Management is Crucial:** Building a fortress requires immense resources (stone, timber, manpower). Plan carefully and secure reliable supply lines to avoid delays and shortages.
- **Defense in Depth is Essential:** Don't rely on a single line of defense. Create multiple layers of protection, including outer walls, moats, and inner keeps, to slow down and wear down attackers.
Step-by-Step Instructions
Site Selection
- Dominating the landscape with good views, steep slopes, river bends for defense, and access to stone, wood, water, and food sources.

Site Selection Initial Construction: Motte and Bailey
- Building a motte (mound) with a wooden palisade and tower, and surrounding it with a ditch and bailey.
Initial Construction: Motte and Bailey Fortifying the Walls: Stone Curtain Wall
- Replacing the wooden palisade with a stone curtain wall for increased defense against fire and rot; including crenellations for archer protection and a postern gate for surprise attacks.
Fortifying the Walls: Stone Curtain Wall Building the Keep
- Constructing a stone keep (rectangular or circular) for better security and accommodation than a wooden tower; shell keeps are a compromise.
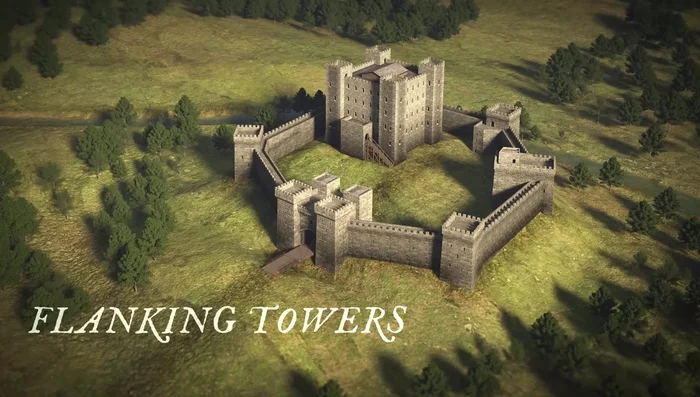
Building the Keep Adding Flanking Towers
- Adding flanking towers at regular intervals along the curtain wall to allow for enfilade fire on attackers.
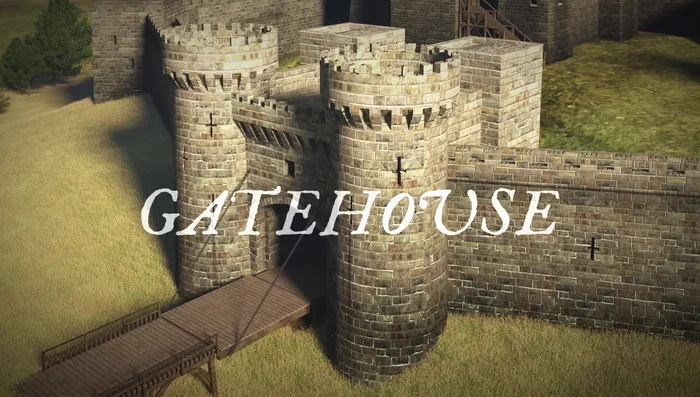
Adding Flanking Towers Securing the Entrance: Gatehouse Construction
- Constructing a strong gatehouse with towers on either side, an outer and inner gate, portcullises, and a drawbridge; using murder holes in the ceiling and walls for defense.
Securing the Entrance: Gatehouse Construction Expanding the Fortress: Concentric Castle
- Adding a second curtain wall with an outer bailey, more towers, gatehouses strategically positioned, and a water-filled moat for additional defense and aesthetics; incorporating machicolations for dropping projectiles on attackers and possibly a barbican.
Expanding the Fortress: Concentric Castle


Read more: Crafting a Biodegradable Woodsman's Whistle: A Step-by-Step Guide
Tips
- Consider the location carefully for defensibility and resource availability.
- Round towers are often stronger than square towers against siege weapons.
- Strategic placement of gatehouses and towers maximizes defensive effectiveness.