The woodsman's whistle, a timeless tool for signaling across vast distances, traditionally relies on materials with a significant environmental footprint. This guide offers an alternative: crafting a fully biodegradable whistle using readily available, sustainable resources. Forget plastic or metal – we'll be harnessing the power of nature itself to create a functional and eco-conscious tool, minimizing our impact on the environment while retaining the practicality and charm of this classic piece of wilderness equipment.
This project is perfect for anyone interested in bushcraft, sustainability, or simply creating something beautiful and functional with their own hands. Whether you're a seasoned outdoorsman or a curious beginner, let's delve into the step-by-step process of making your own biodegradable woodsman's whistle, ensuring you'll be able to call out to the wild with a clear conscience.
Preparation and Safety Guidelines
- Knife
- Sycamore branch
- Always use sharp tools with caution and appropriate safety gear (eye protection, gloves). Wood carving can cause injury.
- Ensure adequate ventilation when working with any finishes or sealants to avoid inhaling harmful fumes.
- Select biodegradable materials for all components (wood, string, waxes etc.) to ensure the whistle fully decomposes.
Step-by-Step Instructions
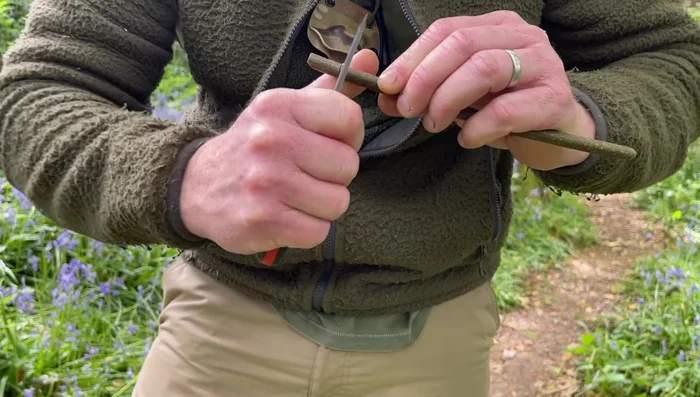
Branch Selection and Preparation
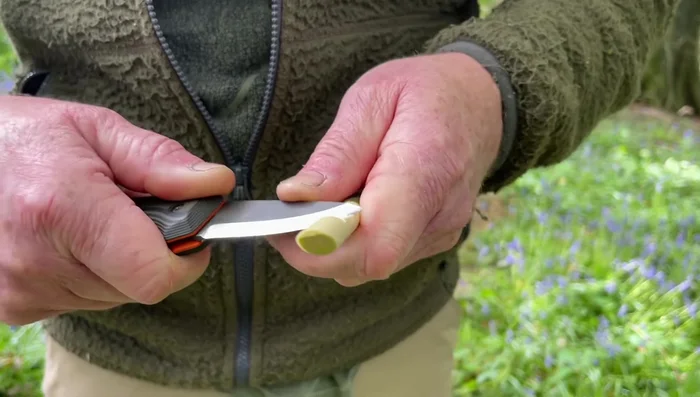
- Select a suitable sycamore branch. Avoid areas with existing branches.
- Trim the branch, making a clean, 45-degree angled cut at one end.
- Remove the sharp tip to prevent injury.

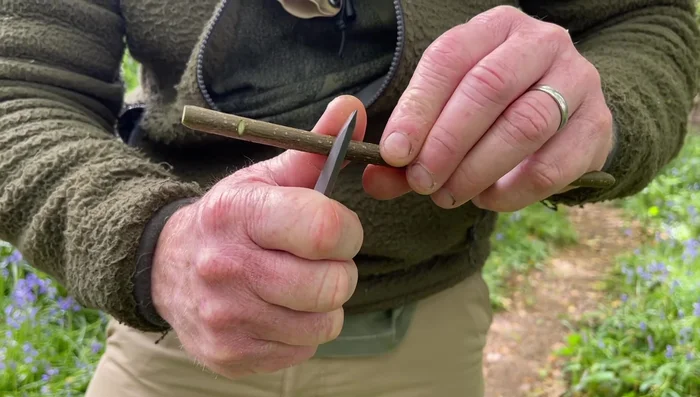
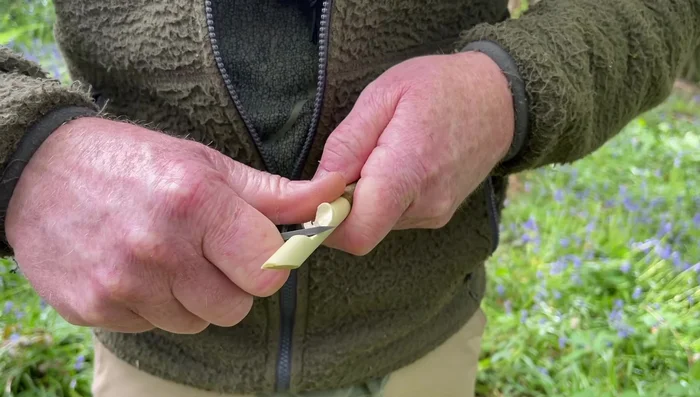
Branch Selection and Preparation Bark Removal
- About one centimeter from the cut end, make a small notch.
- Score the bark around the branch approximately three centimeters from the notch.
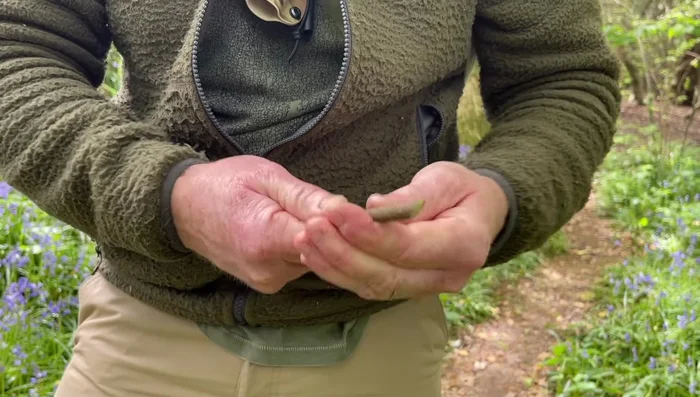
- Gently twist and crack the bark off, using a knife tap to loosen if needed.
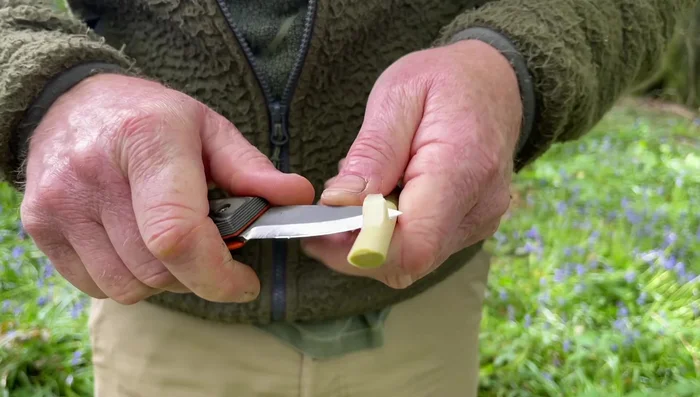
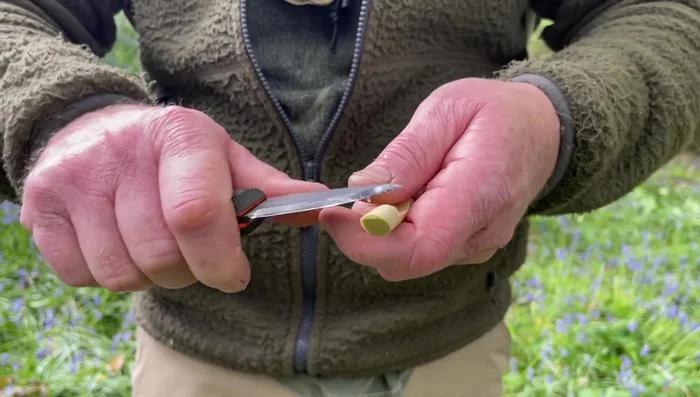
Bark Removal Channel Carving
- Deepen the initial notch and remove excess material progressively to avoid splitting the wood.
- Use a tree stump or fence post for support while cutting to aid precision.
- Keep cuts clean to ensure proper airflow. Use the wood grain to help split fibers.
- Tidy up the bottom of the cut down to the pith.
Channel Carving Finishing Touches
- Cut an angled slope at the opposite end to create an air entry point.
Finishing Touches Reassembly and Testing
- Slide the bark back onto the whistle, aligning the cuts.
Reassembly and Testing


Read more: DIY Spotty Heart Necklace: A Simple Crafting Tutorial
Tips
- Choose a clean section of branch, avoiding areas with branches.
- Make clean cuts to optimize airflow and sound production.
- If the whistle doesn't work, adjust the cuts or moisten the wood to restore its sound.