Transform your space with the warm, enchanting glow of a handcrafted wooden star lantern! This charming DIY project is surprisingly simple, offering a unique and personalized touch to any room, from rustic farmhouse kitchens to modern minimalist living spaces. Imagine the soft light filtering through intricately cut wooden stars, creating a mesmerizing ambiance. Whether you're a seasoned DIY enthusiast or a complete beginner, this project is achievable and rewarding, promising a beautiful addition to your home décor. The beauty lies not just in the creation, but also in the versatility – allowing for endless styling possibilities.
This guide will walk you through the straightforward steps of building your own wooden star lantern, equipping you with the skills and confidence to create a truly special piece. We’ll then explore three stunning styling ideas – each showcasing the lantern's adaptability and potential to enhance diverse interior designs. Ready to get started? Let's dive into the step-by-step instructions and unlock the magic of this captivating DIY project.
Preparation and Safety Guidelines
- 1x2 wood pieces
- Miter saw
- Jig (2x4)
- Clamp
- Wood glue
- Tape
- Staple gun
- Balsa wood
- Ornaments
- Pom-poms
- Hot glue
- Fairy lights
- Moss
- Succulents
- Candles
- Hole saw bit
- Spray paint
- Wiring for light
- Always supervise children around lit candles or electric lights inside the lantern. Never leave a lit lantern unattended.
- Use caution when handling sharp tools like saws and knives during construction. Wear appropriate safety gear like gloves and eye protection.
- Ensure adequate ventilation around the lantern, especially when using candles, to prevent fire hazards and smoke buildup.
Step-by-Step Instructions
Prepare Wood Pieces
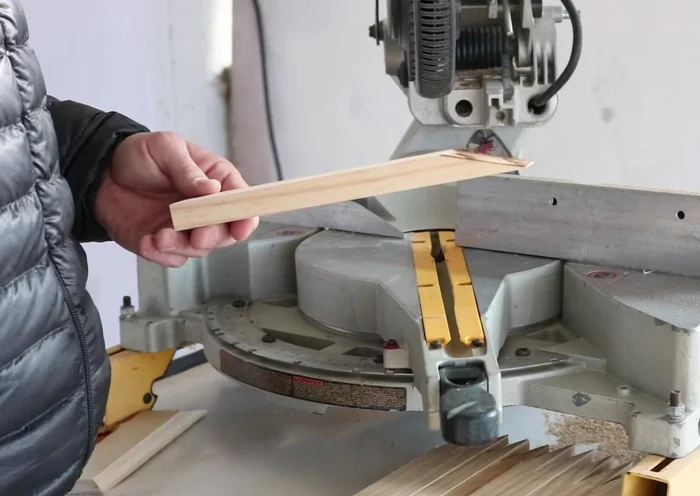
- Cut 10 pieces of 1x2 wood to 10 inches each.

Prepare Wood Pieces Create and Use Jig for Angled Cuts
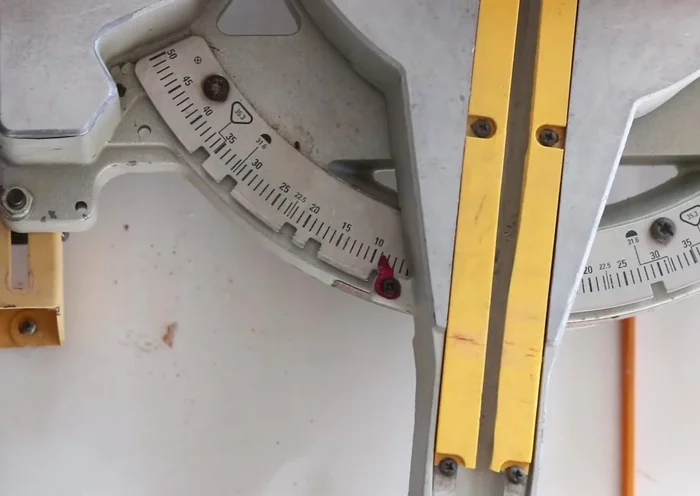
- Create a jig using a 2x4 and miter saw set to 45 degrees to get 18-degree angled cuts on one end of each piece.
- Cut all 10 pieces at a 18-degree angle on one end.
Create and Use Jig for Angled Cuts Cut Remaining Angles
- Set miter saw to 36 degrees. Cut the other end of each piece at this angle.
Cut Remaining Angles Assemble the Wooden Star
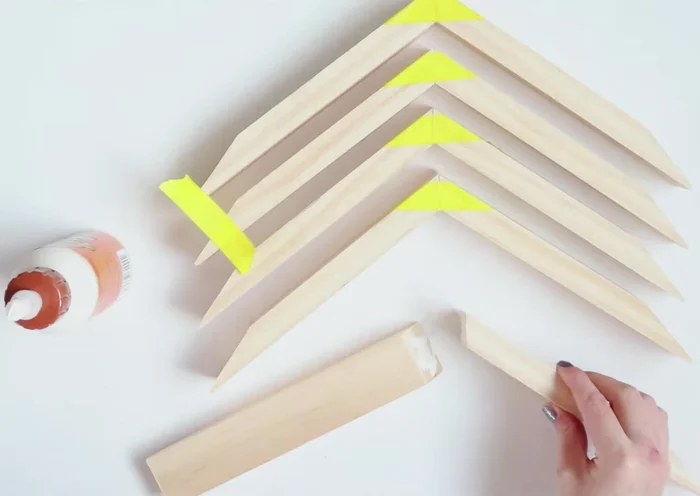
- Assemble the star using wood glue and tape to secure the 36-degree angled cuts, then the 18-degree cuts.
Assemble the Wooden Star Secure and Finish the Star
- Flip the star and staple the seams on the back.
- Add a balsa wood backing to the star using glue.
Secure and Finish the Star Finishing Touches
- Stain the star (optional).
Finishing Touches


Read more: Crafting a Biodegradable Woodsman's Whistle: A Step-by-Step Guide
Tips
- Clamping the 2x4 to the miter saw before cutting will save time and ensure accurate alignment.
- Taping the sides of the star before flipping helps significantly with assembly.
- Use a heavy-duty staple gun for better results when attaching the seams.
- If using for planting succulents, use plywood instead of balsa wood for durability.
- For the lantern, mark and drill holes for the light *before* assembling the star.