Christmas is a time for heartwarming decorations and joyful crafting, and this year, why not add a touch of rustic charm to your festive displays with adorable DIY log reindeer? These charming creatures are surprisingly easy to make, requiring only a few simple materials and a little bit of creativity. Forget expensive store-bought decorations – let's embrace the cozy spirit of the season with a project that's both fun and rewarding for the whole family. Imagine these delightful reindeer nestled amongst your twinkling lights and fragrant pine boughs, bringing a unique, handcrafted touch to your holiday scene.
This step-by-step guide will walk you through the process of creating your own set of whimsical log reindeer, from gathering the necessary supplies to adding the finishing touches. With clear instructions and helpful images, you'll be crafting your own festive herd in no time, ready to spread holiday cheer throughout your home. Prepare to be amazed at how easily these rustic beauties come together – let the crafting begin!
Preparation and Safety Guidelines
- Logs (various sizes)
- Drill with Forstner bit (35mm or matching leg thickness)
- Construction adhesive
- Googly eyes
- Super glue
- Red pom-pom
- Always supervise children when handling tools like saws and knives. Logs can be heavy and sharp edges are a risk.
- Wear safety glasses to protect your eyes from wood splinters or flying debris when sawing or sanding.
- Ensure the logs are properly dried and free from rot or insect infestation before working with them to prevent splintering or structural weakness.
Step-by-Step Instructions
Gather Materials
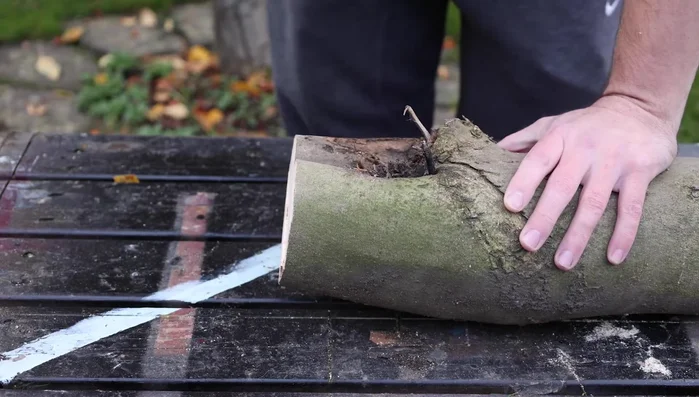
- a large one for the body, a smaller one for the head, and several smaller ones for the legs and antlers.

Gather Materials Prepare Logs
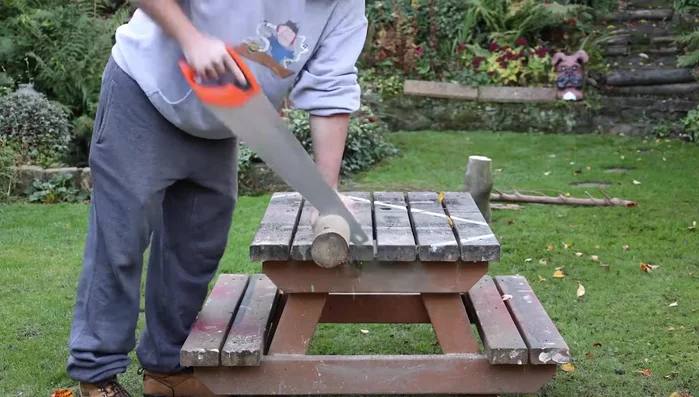
- Cut the logs to the desired size for the body, head, legs, and antlers.
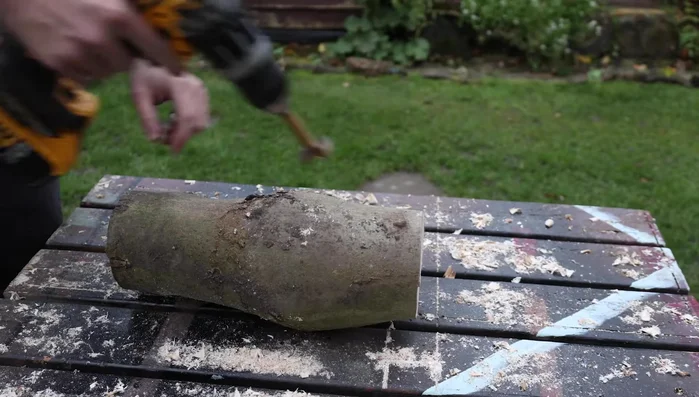
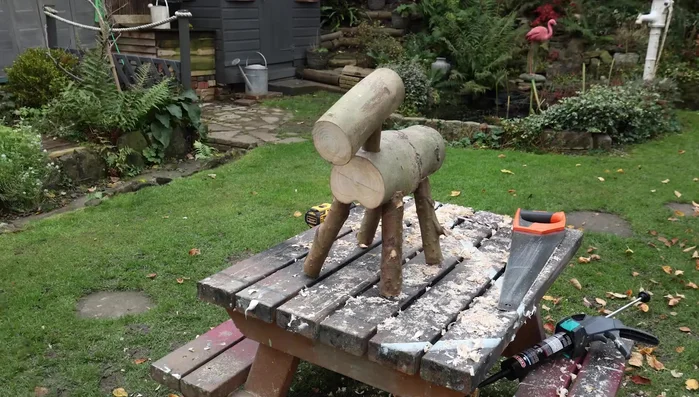
Prepare Logs Drill Holes for Legs and Neck
- Drill holes in the underside of the body log for the legs, using a drill bit that matches (or is slightly larger than) the leg thickness.
- Drill a hole in the front of the body log for the neck.
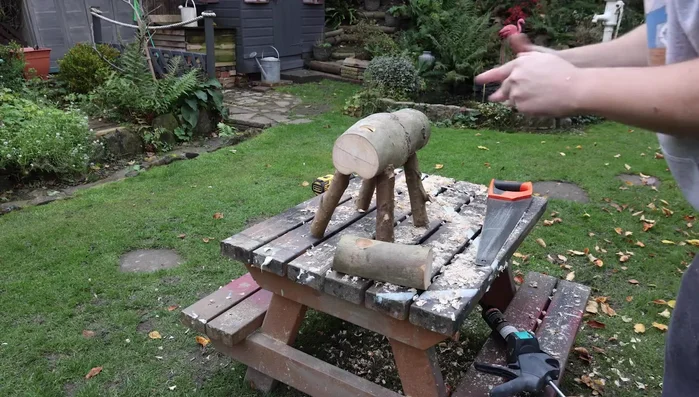
Drill Holes for Legs and Neck Attach Legs
- Apply construction adhesive to the legs and insert them into the pre-drilled holes in the body.
Attach Legs Attach Head
- Glue the neck piece to the head log.
- Glue the head (with the neck attached) to the body.
Attach Head Add Facial Features
- Attach googly eyes using super glue.
- Attach a red pom-pom to the nose.
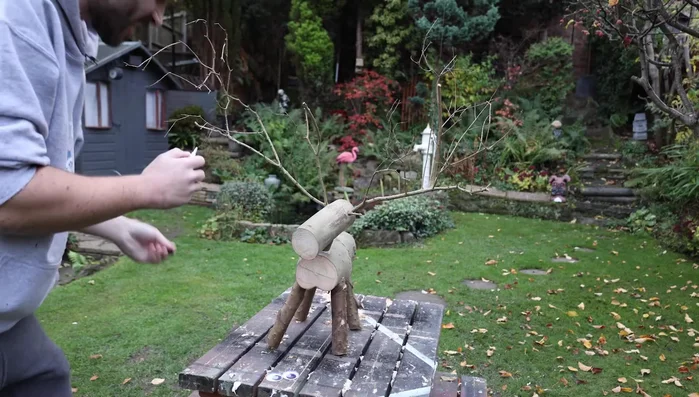
Add Facial Features Attach Antlers (Optional)
- Attach antlers (if using) with construction adhesive.


Read more: Crafting a Biodegradable Woodsman's Whistle: A Step-by-Step Guide
Tips
- Always ask permission before taking logs from someone else's property, even if they appear to be discarded.
- Construction adhesive works well both indoors and outdoors, even with damp wood.