The holiday season calls for festive decorations, and what’s more charming than a handcrafted cedar star? Forget complex woodworking projects and time-consuming crafting techniques; this year, create stunning cedar star ornaments with surprising speed and simplicity. Imagine the warm, inviting scent of cedar filling your home, mingling with the joyful spirit of the holidays, all thanks to a quick and easy DIY project that even beginners can master. These rustic stars add a touch of natural elegance to any Christmas tree, mantelpiece, or gift wrapping.
This guide outlines the absolute fastest and easiest method for crafting beautiful cedar star decorations, perfect for last-minute gifting or adding a personal touch to your festive décor. Ready to transform simple cedar into stunning holiday ornaments in minutes? Let's dive into the step-by-step instructions and create some magical cedar stars together.
Preparation and Safety Guidelines
- 1x4 cedar fence pickets
- saw
- jig (with 18-degree and 90-degree angles)
- square
- clamps
- pocket hole jig
- pocket hole screws
- drill
- brad nails (optional)
- miter saw (for fine-tuning)
- Always use sharp, well-maintained tools to avoid injury. Cedar can be tough to cut, so take your time and be careful.
- Wear safety glasses to protect your eyes from wood splinters or flying debris when cutting or sanding.
- Cedar can cause skin irritation in some individuals. Wear gloves if you have sensitive skin or a history of allergic reactions to wood.
Step-by-Step Instructions
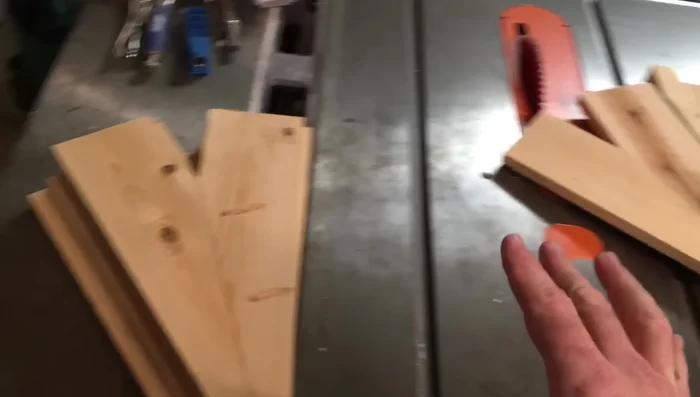
Prepare Cedar Pickets
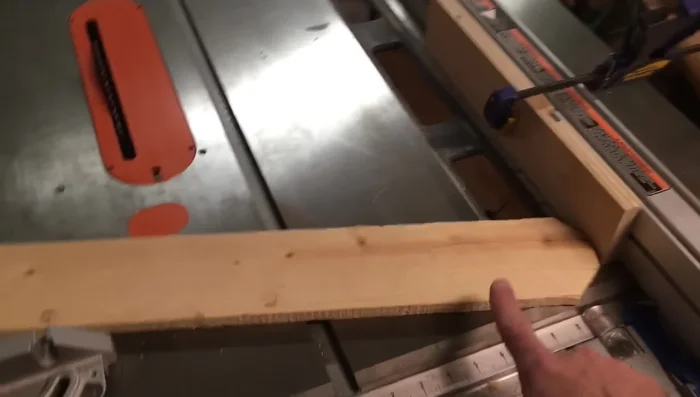
- Cut cedar pickets to length (slightly over 14.5 inches).
- Square up the edges of all pieces.

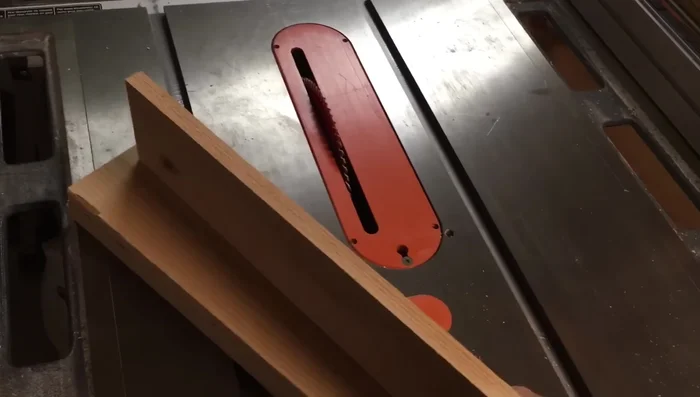
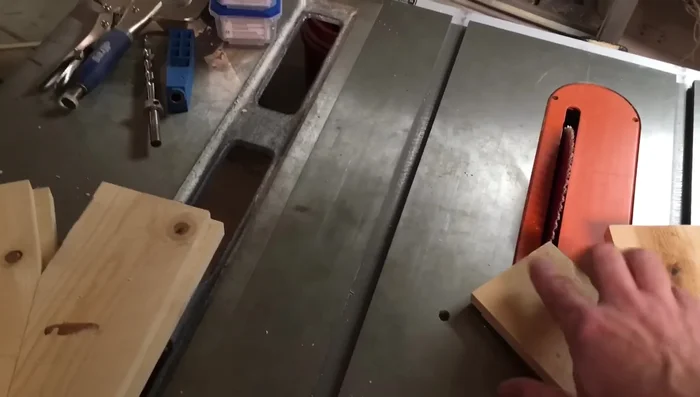
Prepare Cedar Pickets Cut Angles
- Use the jig to cut 18-degree angles on all pieces.
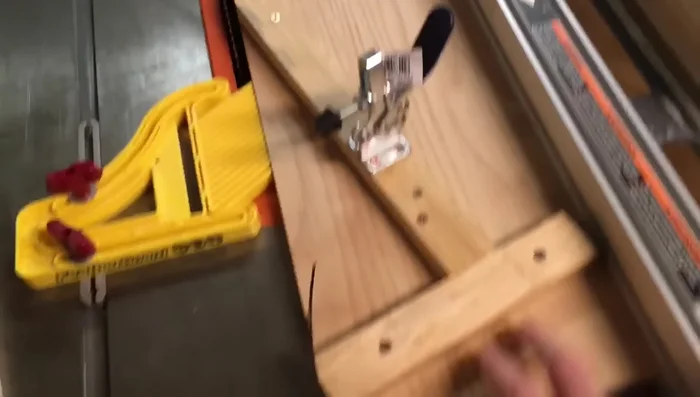
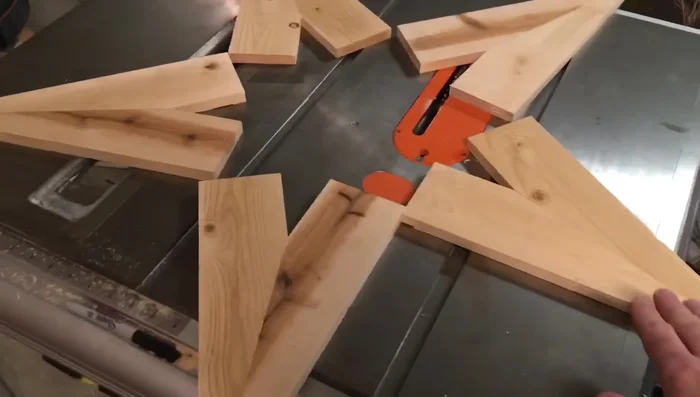
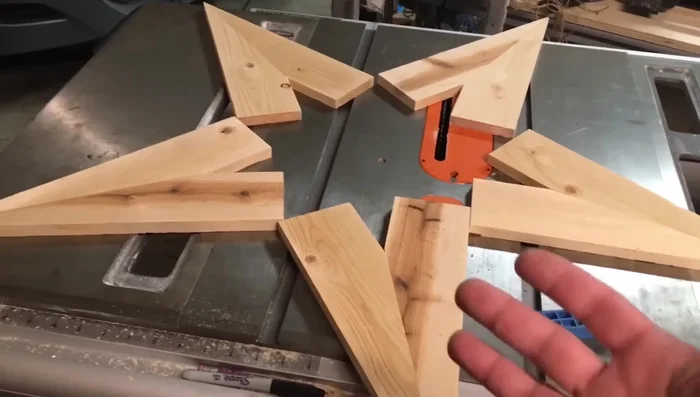
Cut Angles Layout and Prep for Assembly
- Lay out the star pieces, arranging for best visual appeal. Don't screw together yet.
- Flip pieces over, select the same side on each piece for pocket holes, and drill pocket holes on the backside.
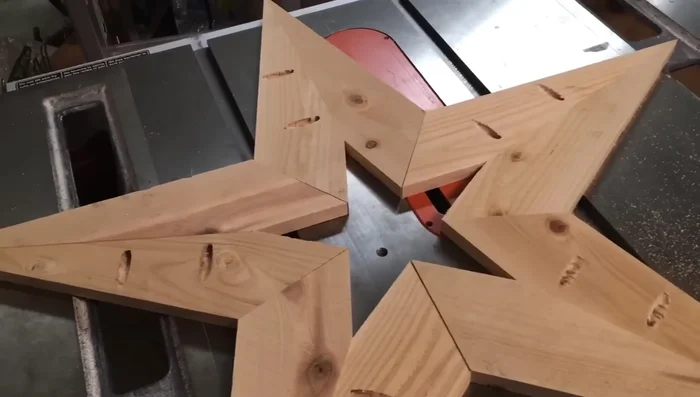
Layout and Prep for Assembly Assemble Star
- Assemble the star using pocket hole screws. Use a clamp to hold it together during assembly.
Assemble Star Cut Final Angles
- Use the jig again to cut a 54-degree angle on the ends of the assembled star. Fine-tune with a miter saw if needed.
Cut Final Angles Final Assembly and Finishing
- Add glue or biscuits for stronger joints, add brad nails to secure the initial pieces.
Final Assembly and Finishing
Read more: Crafting a Biodegradable Woodsman's Whistle: A Step-by-Step Guide
Tips
- Precision is key; even small angle errors will magnify as you assemble the star.
- Ensure your cuts are straight and even before using the jig; it helps with precise angles and prevents gaps.
- Save offcuts for smaller star projects.
- Use a clamp to keep pieces in place while cutting angles with the jig.
- Fine-tune the assembled star with a miter saw to close any small gaps.