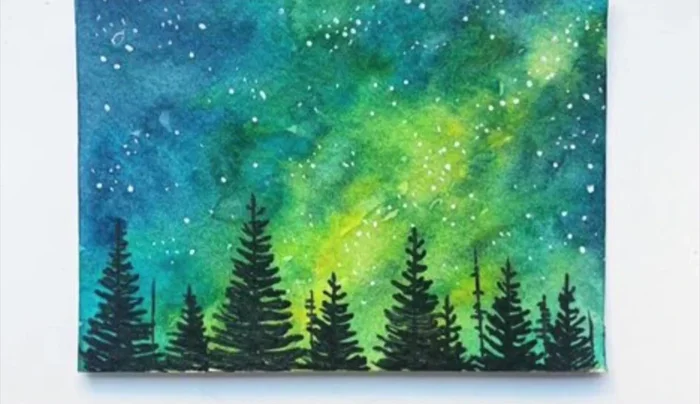
Watercolor painting, with its luminous transparency and evocative washes, offers a unique pathway to capturing the beauty of the natural world. Landscapes, in particular, lend themselves beautifully to this delicate medium, allowing for the expression of atmospheric perspective and the subtle interplay of light and shadow. From the vibrant hues of a sun-drenched meadow to the muted tones of a misty mountain range, the possibilities are as limitless as your imagination. Learning to master this technique, however, can seem daunting for beginners.
This guide provides a comprehensive, step-by-step approach to tackling the challenges of watercolor landscape painting, regardless of your current skill level. We'll break down complex techniques into manageable stages, guiding you from initial washes to the final, refined details. Let's embark on this creative journey together and discover the joy of translating the breathtaking beauty of the landscape onto paper.
Preparation and Safety Guidelines
- Watercolor paints
- Brushes (various sizes)
- Pencil
- Paper
- Water
- Always work in a well-ventilated area. Watercolor paints and mediums can release fumes that are harmful if inhaled.
- Protect your work surface. Watercolor is notoriously messy; use a waterproof surface or cover it with plastic sheeting.
- Clean your brushes thoroughly after each use. Dried paint will ruin your brushes and make them difficult to use.
Step-by-Step Instructions
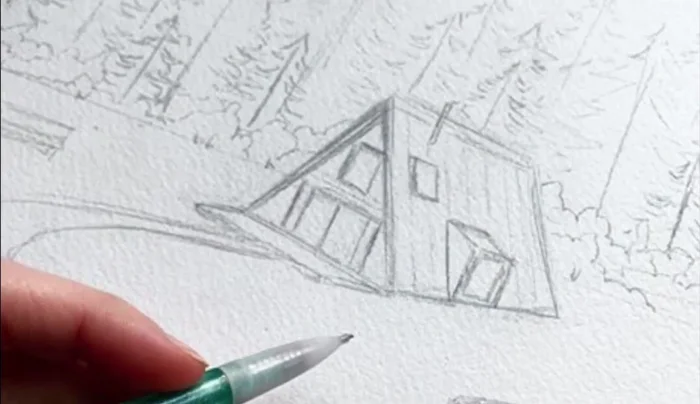
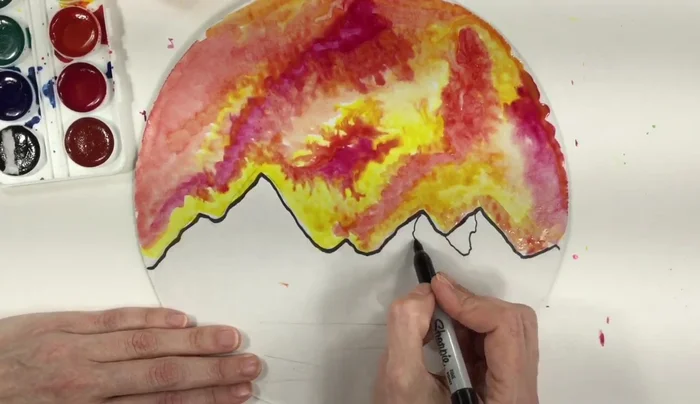
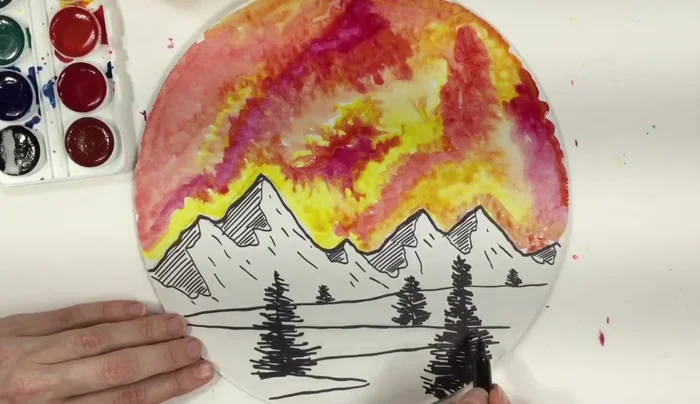
Sketching the Landscape
- Begin with a pencil sketch outlining the main elements of your landscape (mountains, trees, etc.).

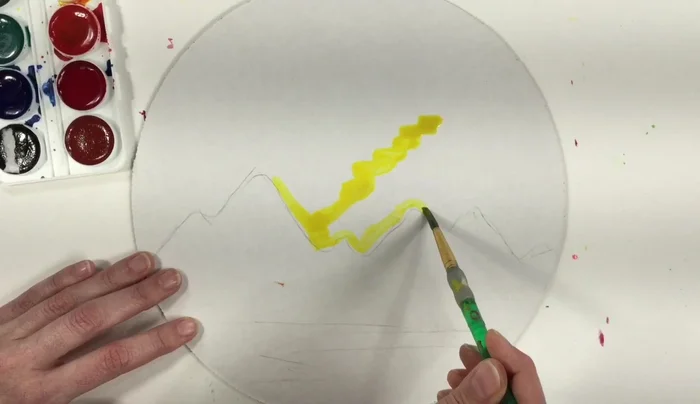
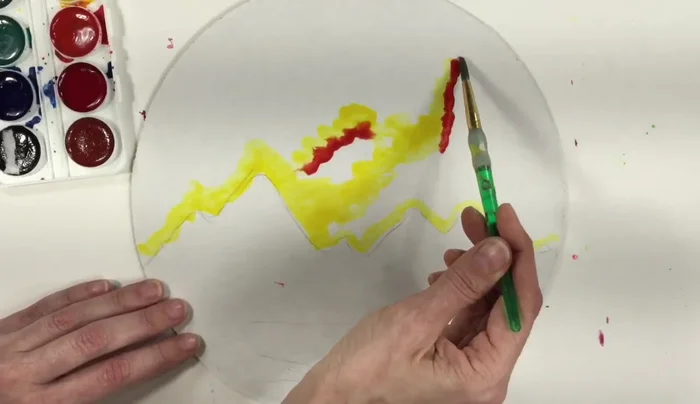
Sketching the Landscape Initial Watercolor Washes
- Apply base watercolor washes, using more water for lighter colors and less for darker shades.
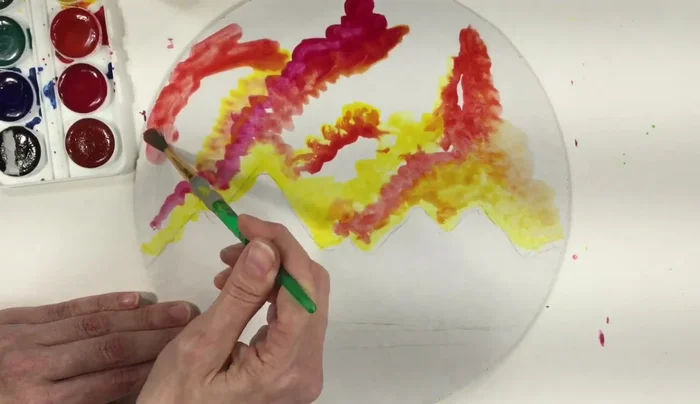
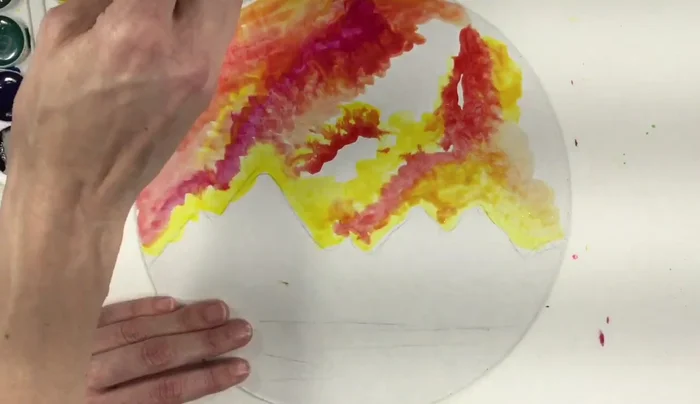
Initial Watercolor Washes Layering and Blending
- Allow the washes to dry slightly before layering additional colors.
- Experiment with color blending and bleeding to achieve desired effects.
- Gradually build up layers of color and detail, ensuring sufficient drying time between layers.
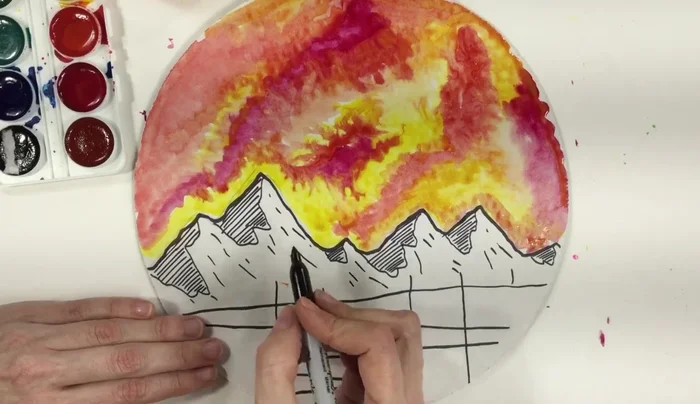
Layering and Blending Adding Texture and Details
- Use varied brushstrokes to create texture in different parts of the painting (e.g., rough strokes for mountains, fine strokes for details).
- Add details such as shadows and highlights using finer brushes and a more controlled application of paint.
- Refine the composition by adding texture with smaller details.
Adding Texture and Details Final Refinements
- Add final touches and adjustments as needed.
Final Refinements
Read more: Reverse Silhouette Painting: Underwater Scene Masterclass
Tips
- Use more water for lighter, more translucent colors.
- Allow layers to dry partially to prevent muddy colors.
- Vary brushstrokes for textural interest.
- Experiment with color blending to create depth and dimension.
- Pay attention to values and contrast to create a visually appealing image.